
Create an order by hand
Place a phone or in-person order for a customer or a guest, add products and other items, and either mark it paid or send the customer a link to pay.
In the admin: SalesOrdersCreate order
On this page
Create an order by hand when a customer orders by phone, by e-mail or in person. The order goes through the same steps as a shop order: prices, tax, stock and shipping are worked out the same way, and the order appears in your orders list like any other. You then either record that the customer already paid, or let the shop collect the payment.
Before you start
- The products must be published. The product list in the form offers your published products, up to 200.
- Decide what the customer should receive by e-mail when you create an unpaid order. This is set once in Settings > Orders (see below).
Create the order
- Go to Sales > Orders and press Create order.
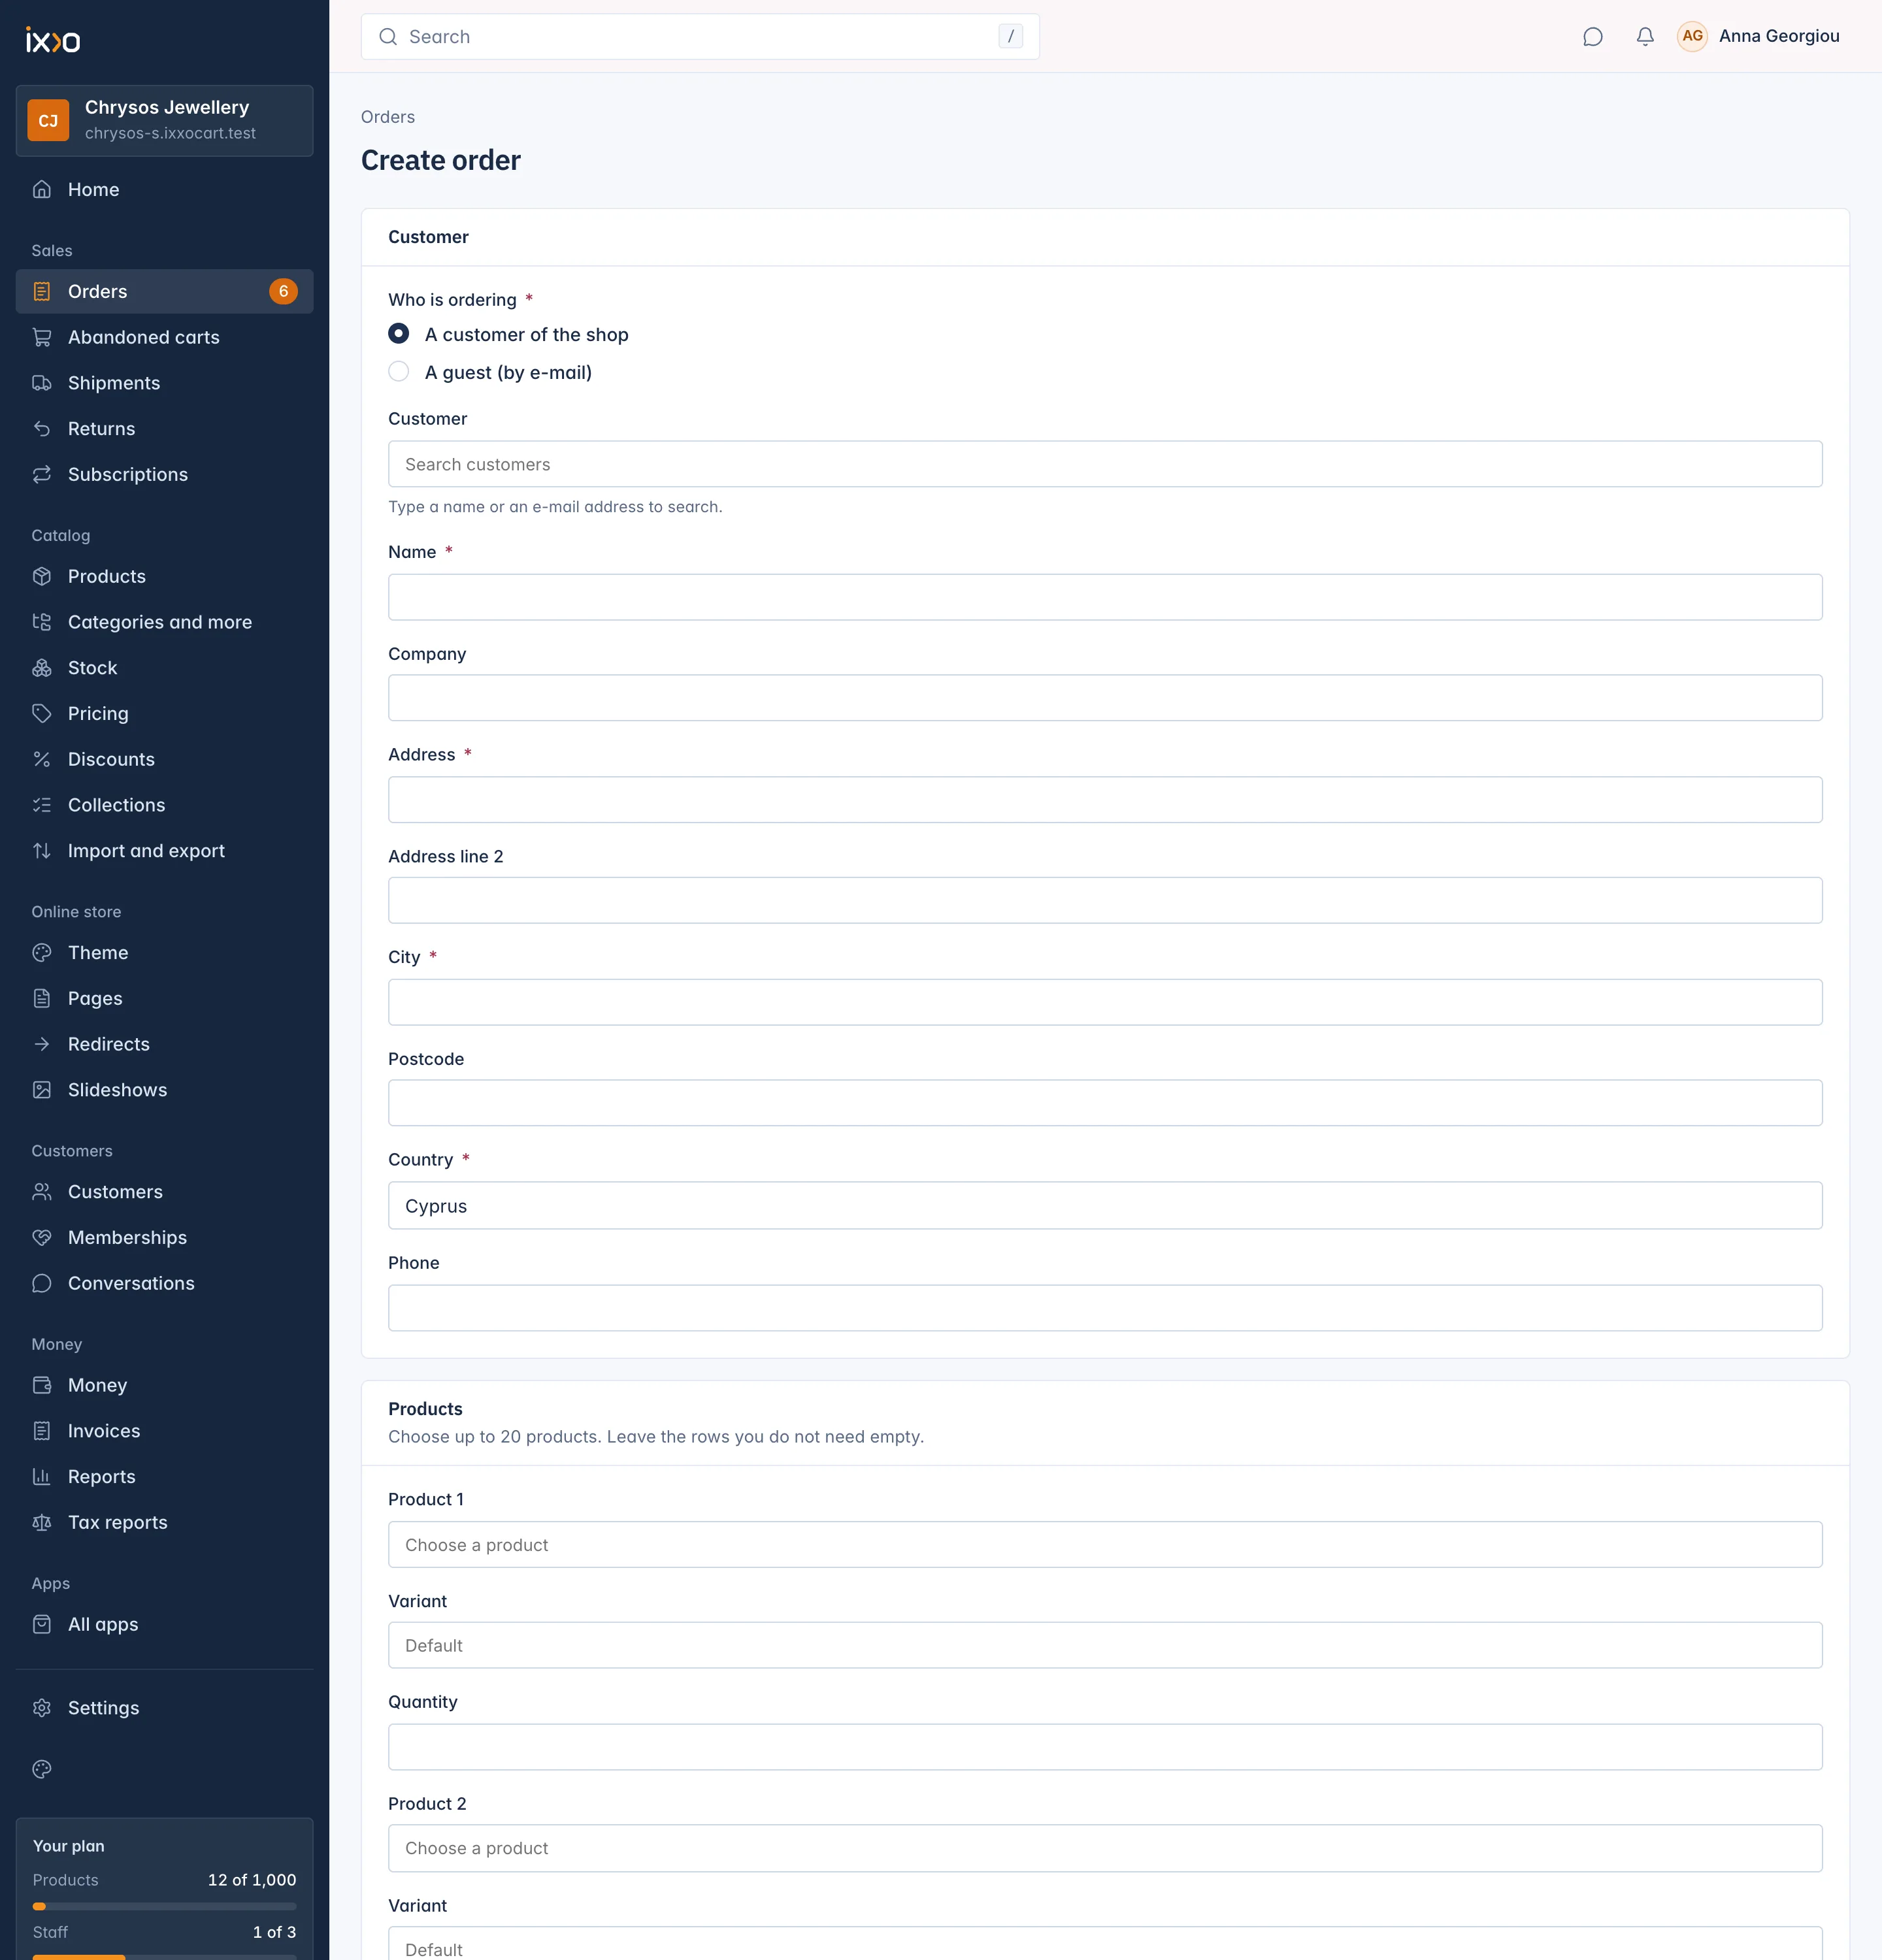
Under Customer, choose Who is ordering:
- A customer of the shop: type a name or e-mail address in Customer and pick the customer from the list.
- A guest (by e-mail): type the customer's E-mail. Order e-mails go to this address.
- Fill in the address: Name, Company (optional), Address, Address line 2, City, Postcode, Country and Phone. The same address is used for the invoice and the delivery.
- Under Products, pick a product in each row you need and type the Quantity. For a product with several variants, choose the Variant; leave it on Default for the product's main variant. Leave the rows you do not need empty. The form shows three product rows.
- Under Other items, add anything that is not a product, such as a gift-wrapping fee or an engraving service: a name, a Unit price, a Quantity and a Tax class. Other items are not shipped.
- Under Shipping and note, choose the Shipping method if you want a particular one. Leave it empty to use the first method offered for the address. Type a Note to the customer if you like.
- Under Payment, choose When the order is created (see the next section).
- Press Create order.
You land on the new order's page with "Order #1043 created." If something does not fit, the form says which field to check, for example "Not enough stock for one of the products." or "This shipping method is not offered for this address and these products."
Paid already, or waiting for payment
When the order is created has two choices.
Mark as paid: "The customer paid you already, for example in cash or by bank transfer." Choose under Paid with how they paid, or leave Any offline method. The order is created as Paid: the stock is taken, the invoice is issued and you can ship it straight away. This choice shows only for staff allowed to confirm offline payments.
Wait for payment: the order waits for the customer to pay with one of the shop's payment methods. What the customer receives depends on your Orders settings, and the form tells you which applies:
- "The customer gets an e-mail with a link to accept and pay the order." The customer opens the link, checks the order and either accepts and pays, or declines it. An order not answered within 7 days is cancelled and its stock goes back. You are told when a customer declines.
- "The customer does not get a link to accept the order." The customer gets the order e-mail, or nothing, as your settings say. The order then has the same time to pay as a shop order (see Order statuses explained).
Send a payment link
On an unpaid order you created, the header shows Send payment link. It e-mails the customer a link to pay the parts still open, with a Pay now button. Use it when the customer lost the first e-mail or asks again. One payment link e-mail can be sent per order every 10 minutes.
Orders settings
Settings > Orders holds two settings for orders:
| Setting | What it does |
|---|---|
| Number of the shop's first order | The number your first order gets, 1000 by default. Only used before the first order; later orders keep counting from the last one. |
| E-mail to the customer when staff create an order for them | Send nothing, Send the order (the default) or Send the order with a link to accept it. |
The link Orders settings on the Create order page takes you there.
Related
Updated 13 November 2026