
Add, hide and arrange sections
Build pages from sections: add, edit, reorder, hide, duplicate or delete them, nest them in columns and style each one.
In the admin: Online storeThemeCustomise
On this page
Every page of your shop is a stack of sections: a hero picture, a row of products, a block of text, a trust strip. You add, change and arrange them in the Sections tab of the theme editor. This article shows how. For what each section type does, see Section types.
How the Sections tab is laid out
The Sections tab shows three groups for the page you picked in Page:.
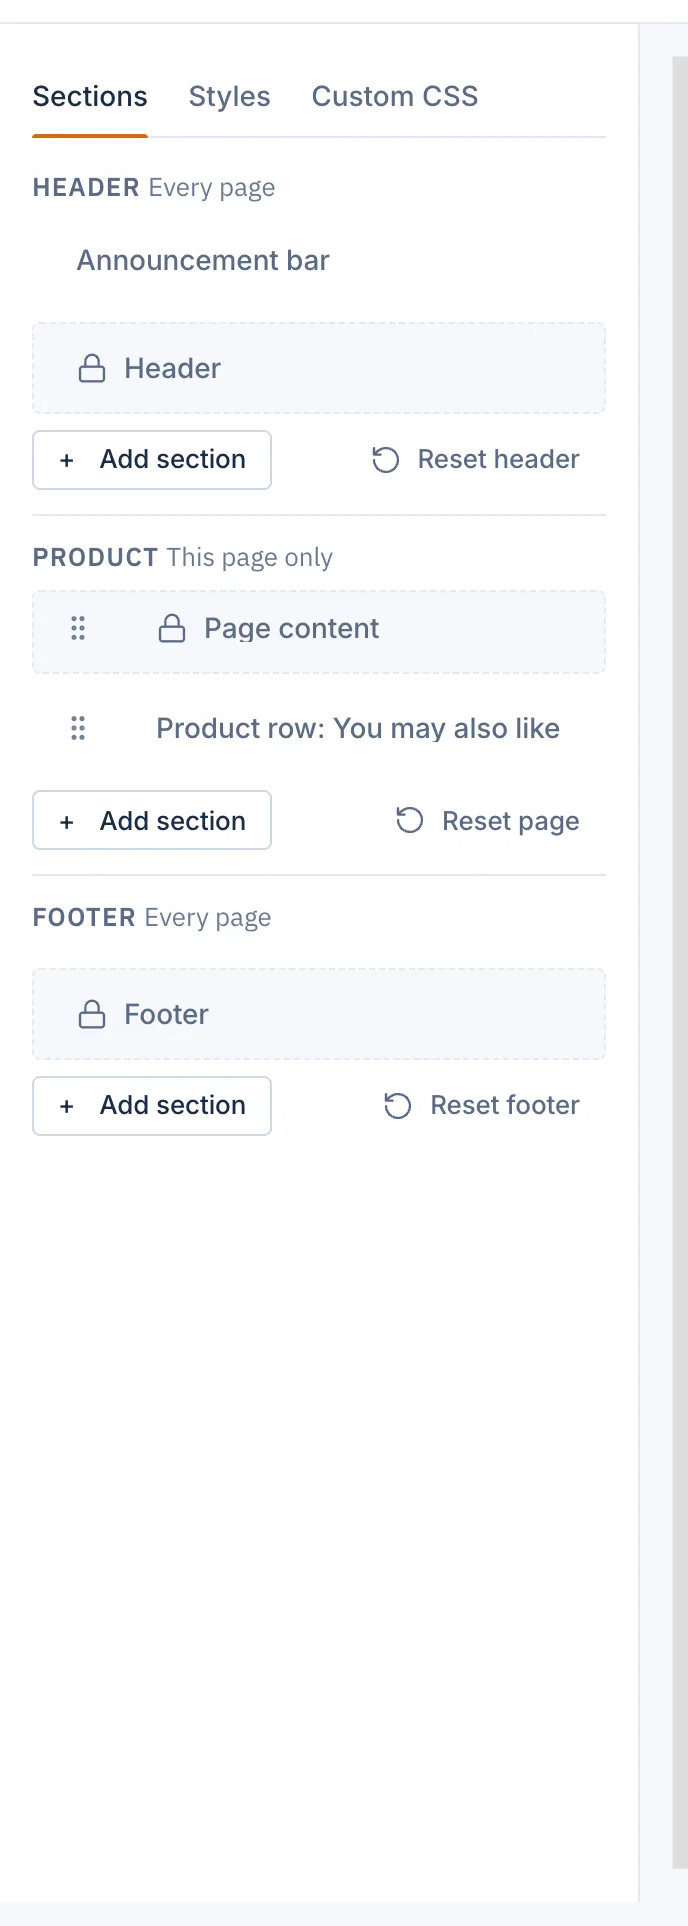
- HEADER, Every page: sections above the header, such as an announcement bar, and the Header itself. What you change here shows on every page.
- The page's own group, This page only: the sections of the page you picked, for example HOME PAGE or PRODUCT. They show only on that kind of page.
- FOOTER, Every page: sections above the footer and the Footer itself. They show on every page.
The Header and Footer rows have a lock. You cannot move or delete them, but you can click them to change their settings. See Edit the header and footer.
The Page content row
On every page except the home page, the page's group has a locked Page content row. It stands for what the page is about: the product with its pictures and price on a product page, the product grid on a category page, the text of an About us page. You cannot delete it, but you can drag it. Sections above it show before the page's own content, sections below it after.
Add a section
- Pick the page in Page:.
- Press Add section under the group where the section should go.
- Choose a section type in Add a section.
The new section is added at the end of the group, opens on the right for you to fill in, and the preview scrolls to it. The list only offers the sections that fit that place. For example, a Contact form can go only on the home page and on content pages, and an Announcement bar only in the header.
Change a section's settings
Click a section in the list, or click it in the preview. Its settings open in the panel on the right.
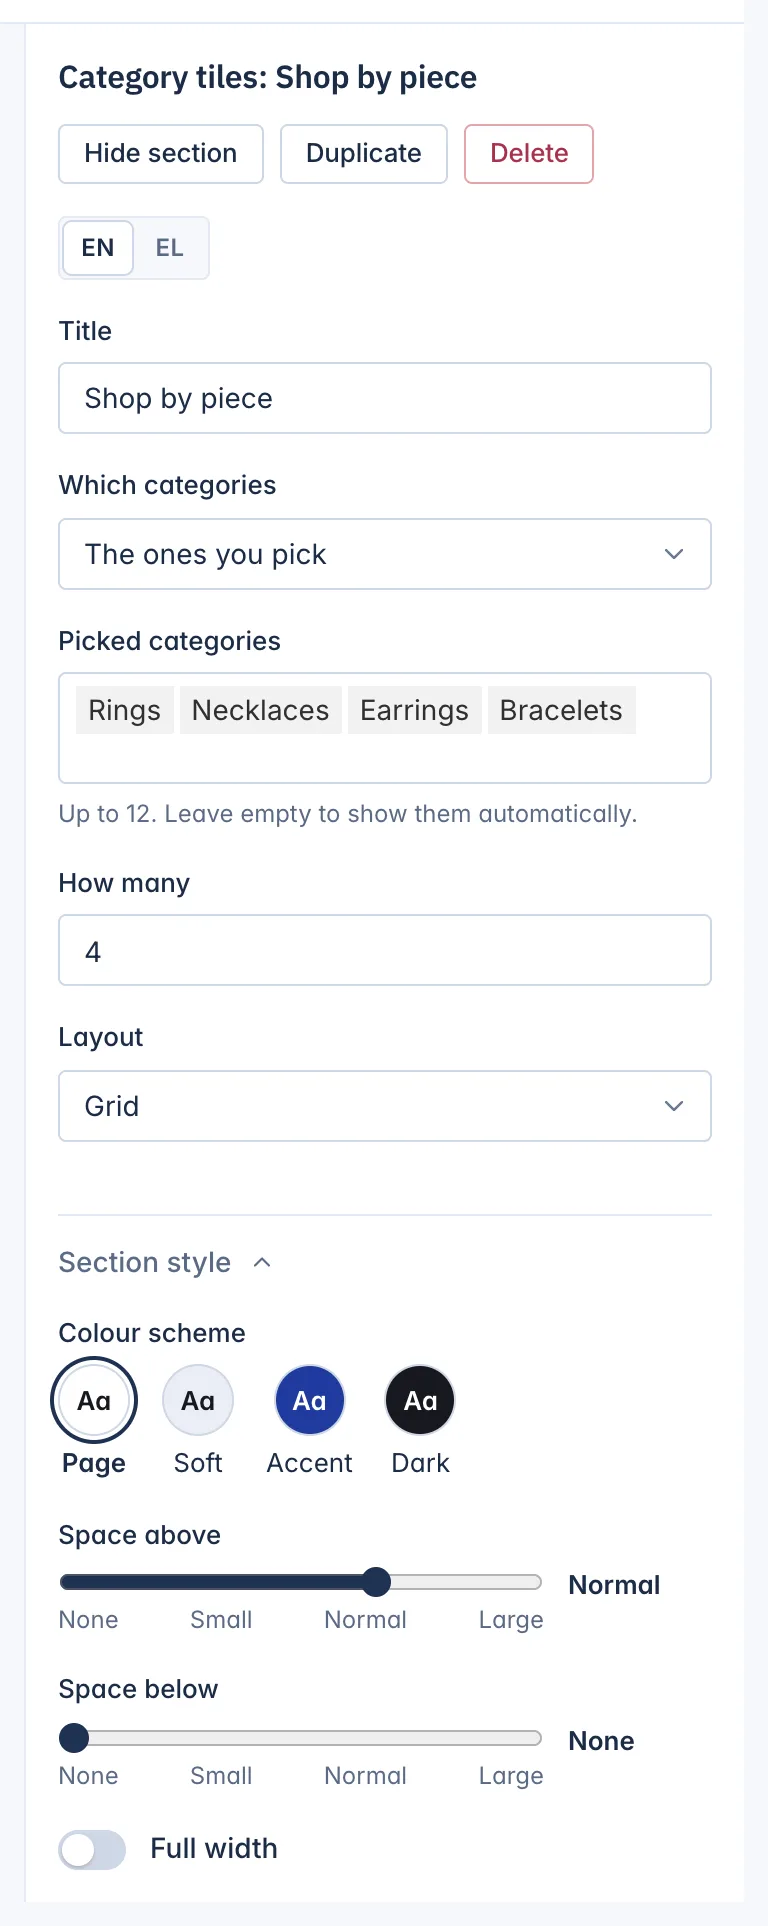
- If your shop has more than one language, a language switch such as EN and EL sits at the top. Texts like headings and button words are written per language. Switch and fill in each language. A text left empty in another language shows the main language's text.
- Lists, such as the slides of a hero or the items of a trust strip, have one row per item. Click a row to open it, drag it or use the arrows to reorder, and press the cross to remove it. Add one with + Add item, + Add slide, + Add tile and similar. The line under the list says how many it can hold, for example Up to 6.
- Pictures are uploaded right in the form. They must be JPEG, PNG or WebP.
- Links take a page of your shop starting with
/, such as/rings, or a full address starting withhttps://.
Every change saves itself into your draft after a moment.
Reorder sections
Drag a section by its handle (the six dots) to a new place in its group. With the keyboard, use Move up and Move down. A section cannot be dragged from one group into another, for example from the page into the footer.
Hide, duplicate or delete a section
The buttons at the top of a section's settings:
- Hide section keeps the section and its settings but stops showing it in the shop. Press Show section to bring it back. Useful for seasonal sections you use every year.
- Duplicate makes a copy right under it, with the same settings. Good for a second product row with another collection.
- Delete removes the section after you confirm Delete this section?. If it holds other sections, such as a Columns section, the message lists them too.
Like every change, these go into your draft. Your shop changes only when you publish.
Put sections side by side with Columns
A Columns section splits its space into two or three columns, and each column holds sections of its own. This is how you put, for example, a picture beside a product row, or a text block beside a contact form.
- Add a Columns section.
- Choose its Layout: Two halves, One third, two thirds, Two thirds, one third or Three thirds.
- In the left column of the editor, each column of the section is listed with its own Add to Column 1 (2, 3) button. Use it to add content to that column.
A column can hold these sections: Image with text, Product row, Rich text, Slideshow, some app sections, and a Block. A Block is a small piece made for columns: a text, a picture, a button, a video, one product or a slideshow. A column holds up to 6 items, and a column cannot hold another Columns section.
You can drag items within a column and from one column into another of the same section. A section cannot be dragged from the page into a column, or out of a column onto the page: add it in the column instead. Sections inside columns do not count towards the page's section limit. Each column can have its own colours: Column 1 colours and so on, with Theme default, Page, Soft, Accent or Dark.
In the footer, a Columns section works the same way, with the footer's sections.
Style a single section
At the end of most sections' settings is a folded Section style group. It changes how that one section sits on the page, without touching the others.
- Colour scheme: Page (the page's own colours), Soft, Accent or Dark. The swatches show the colours each scheme uses. You set those colours in Styles, see Change colours, fonts and buttons.
- Space above and Space below: None, Small, Normal or Large.
- Full width: lets the section run from edge to edge of the screen instead of the page width.
- Show on: All screens, Phone or Computer. A section shown on one kind of screen only gets a Phone only or Computer only tag in the list. Use this to give phones a shorter page.
A section inside a column has only Colour scheme and Show on. The header, the footer, the announcement bar, blocks and the Page content row have no Section style.
Start a page again
Under each group is a reset button: Reset page, Reset header or Reset footer. It brings that group's sections and settings back to how the theme has them. Your live shop changes only when you publish, and Discard draft can still undo it.
Related
Updated 13 November 2026