
Add your first product
Create a product, give it a price, photos and stock, and publish it so customers can buy it. The quick version for your first sale.
In the admin: CatalogProducts
On this page
To sell, your shop needs at least one published product. This quick guide takes you from an empty catalogue to a product customers can buy: title, price, photo, stock and publish. Everything else a product can do (variants, categories, families, downloads, SEO and more) is covered in the Catalog section.
1. Create the product
- In the sidebar, go to Catalog > Products and press Add product.
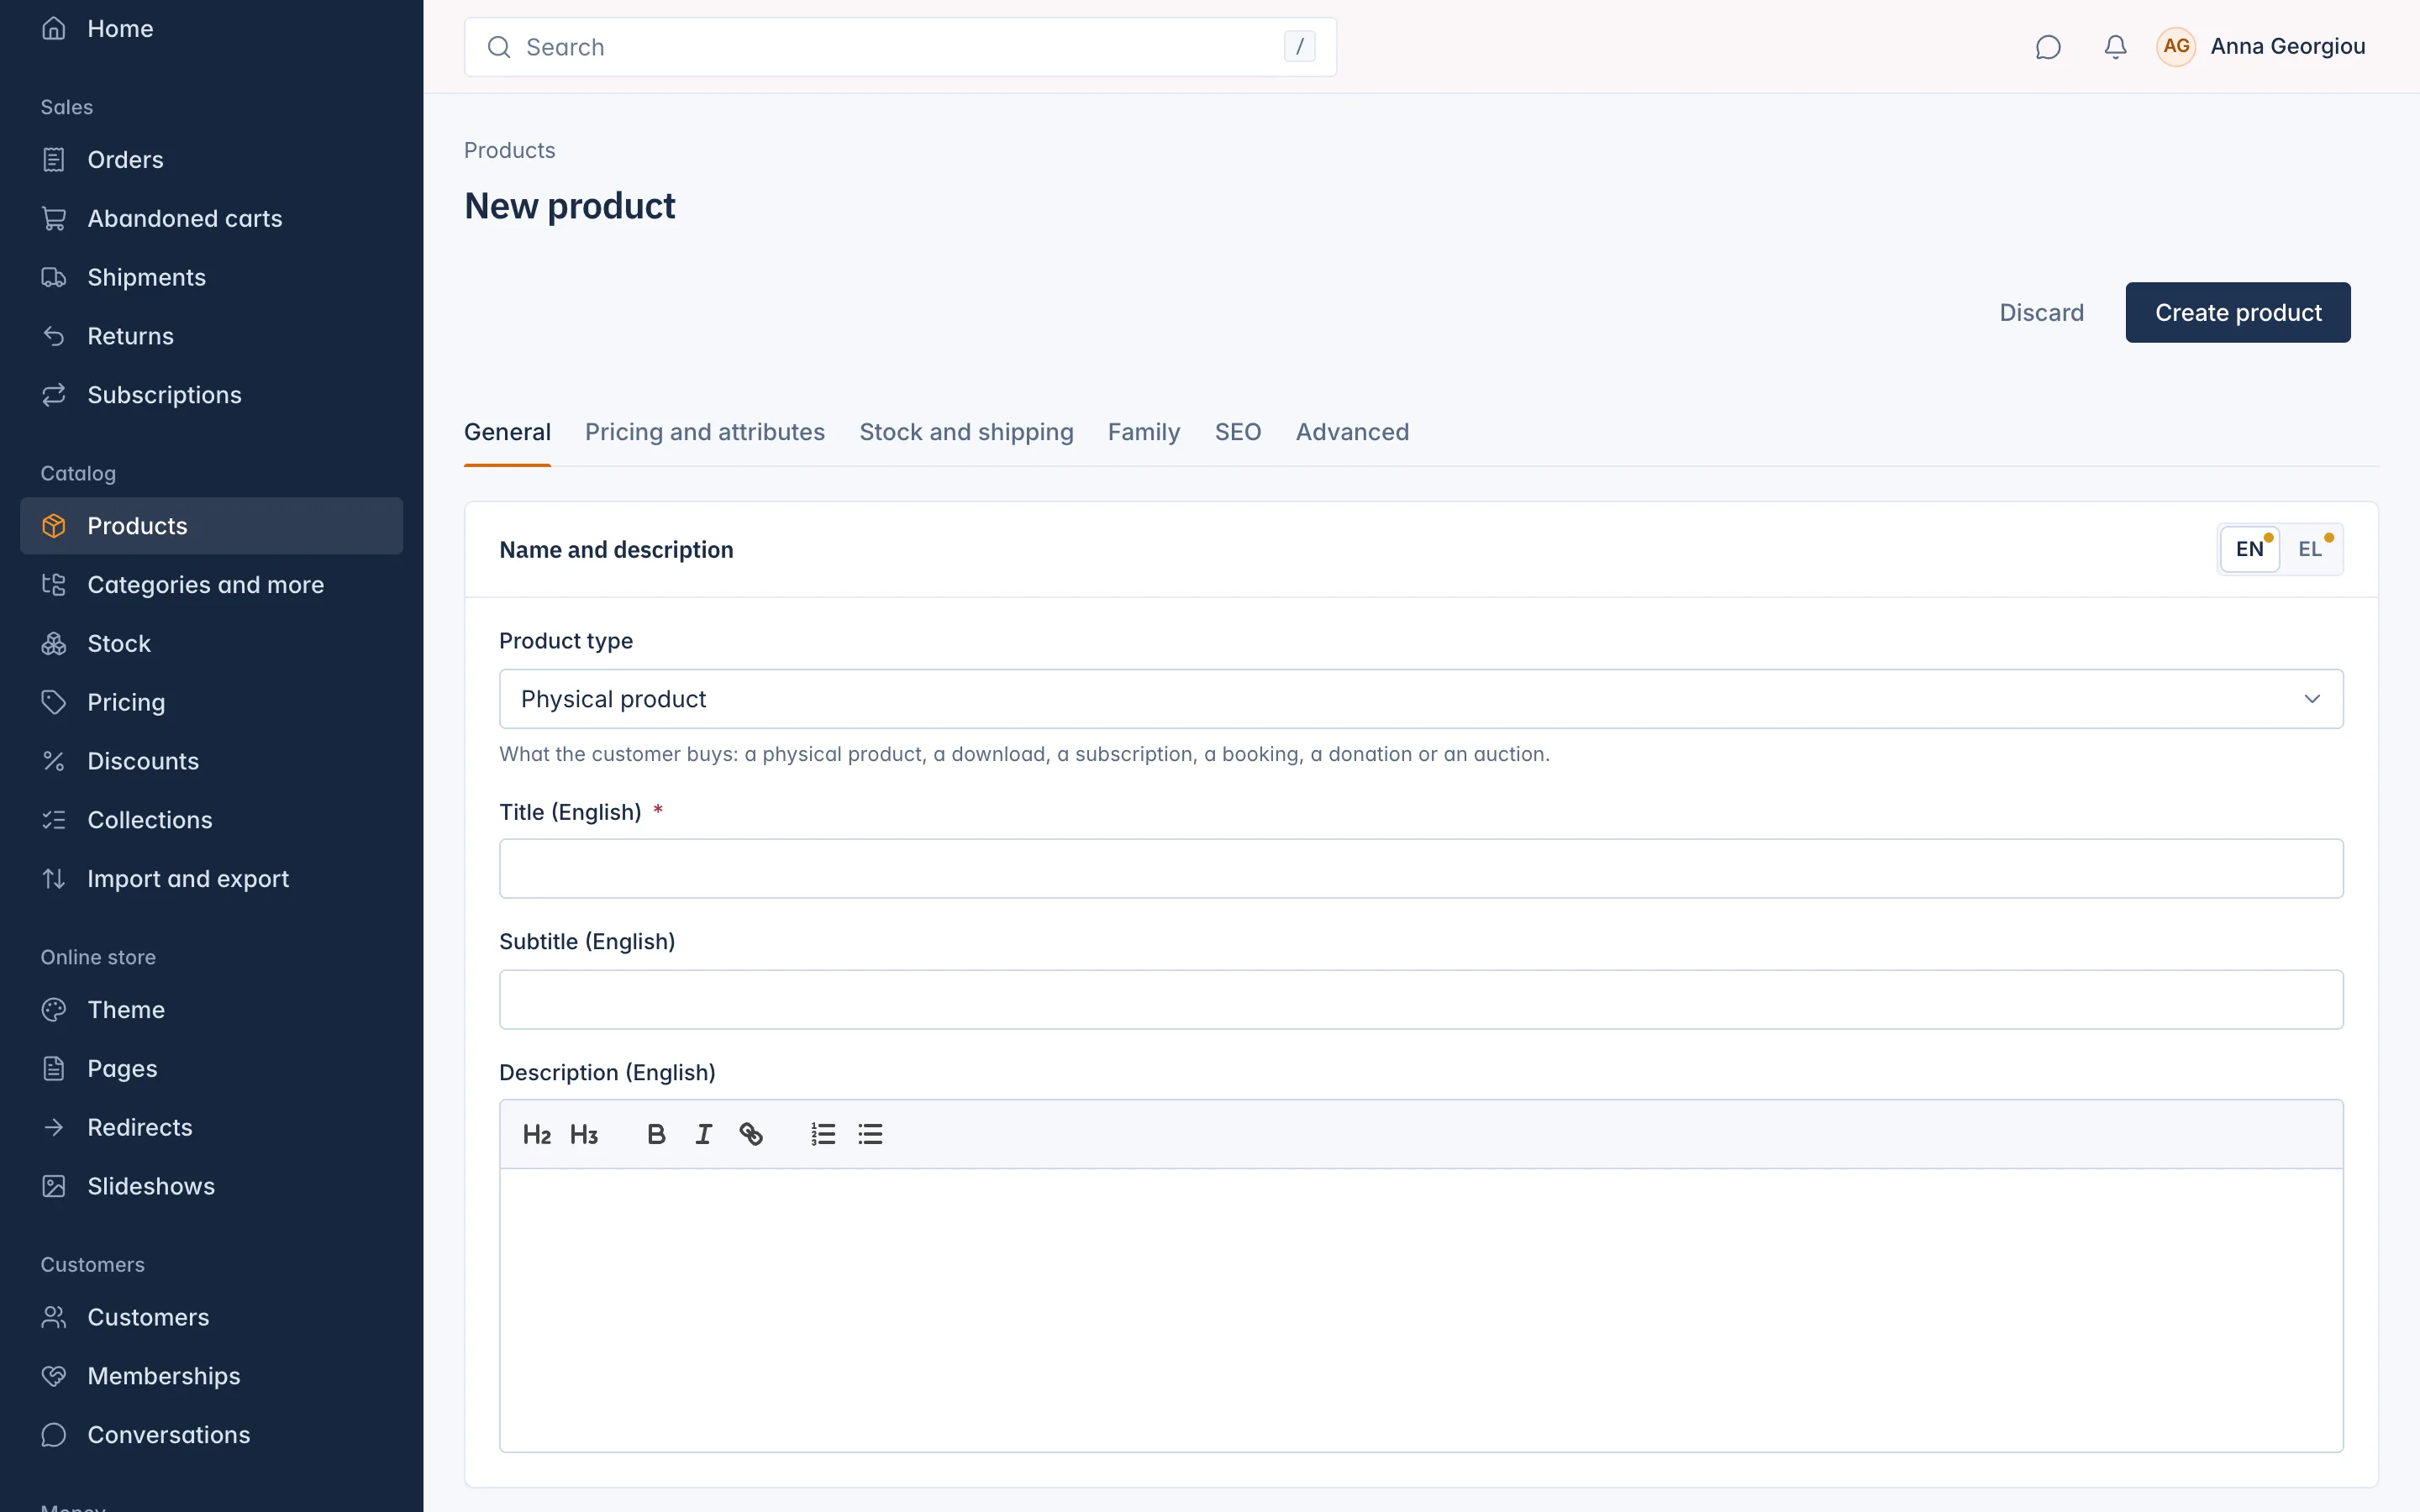
- On New product, check the Product type. Physical product is the right choice for goods you ship. The other types are for downloads, subscriptions, bookings, donations and auctions.
- Type the Title. It is the only required field. Add a Subtitle and a Description if you like; you can also do it later.
- Press Create product.
The product is saved as a Draft, which customers cannot see, and the Pricing and attributes tab opens with the message Product created. Now set its price.
2. Set the price
On Pricing and attributes:
- Type the Price customers pay.
- Optional: a Compare-at price shows struck through next to the price, for a product on sale. A Cost price is what the product costs you; customers never see it.
- Optional: under Product codes, add your SKU (your own stock code) and a barcode (GTIN).
- Press Save at the top.
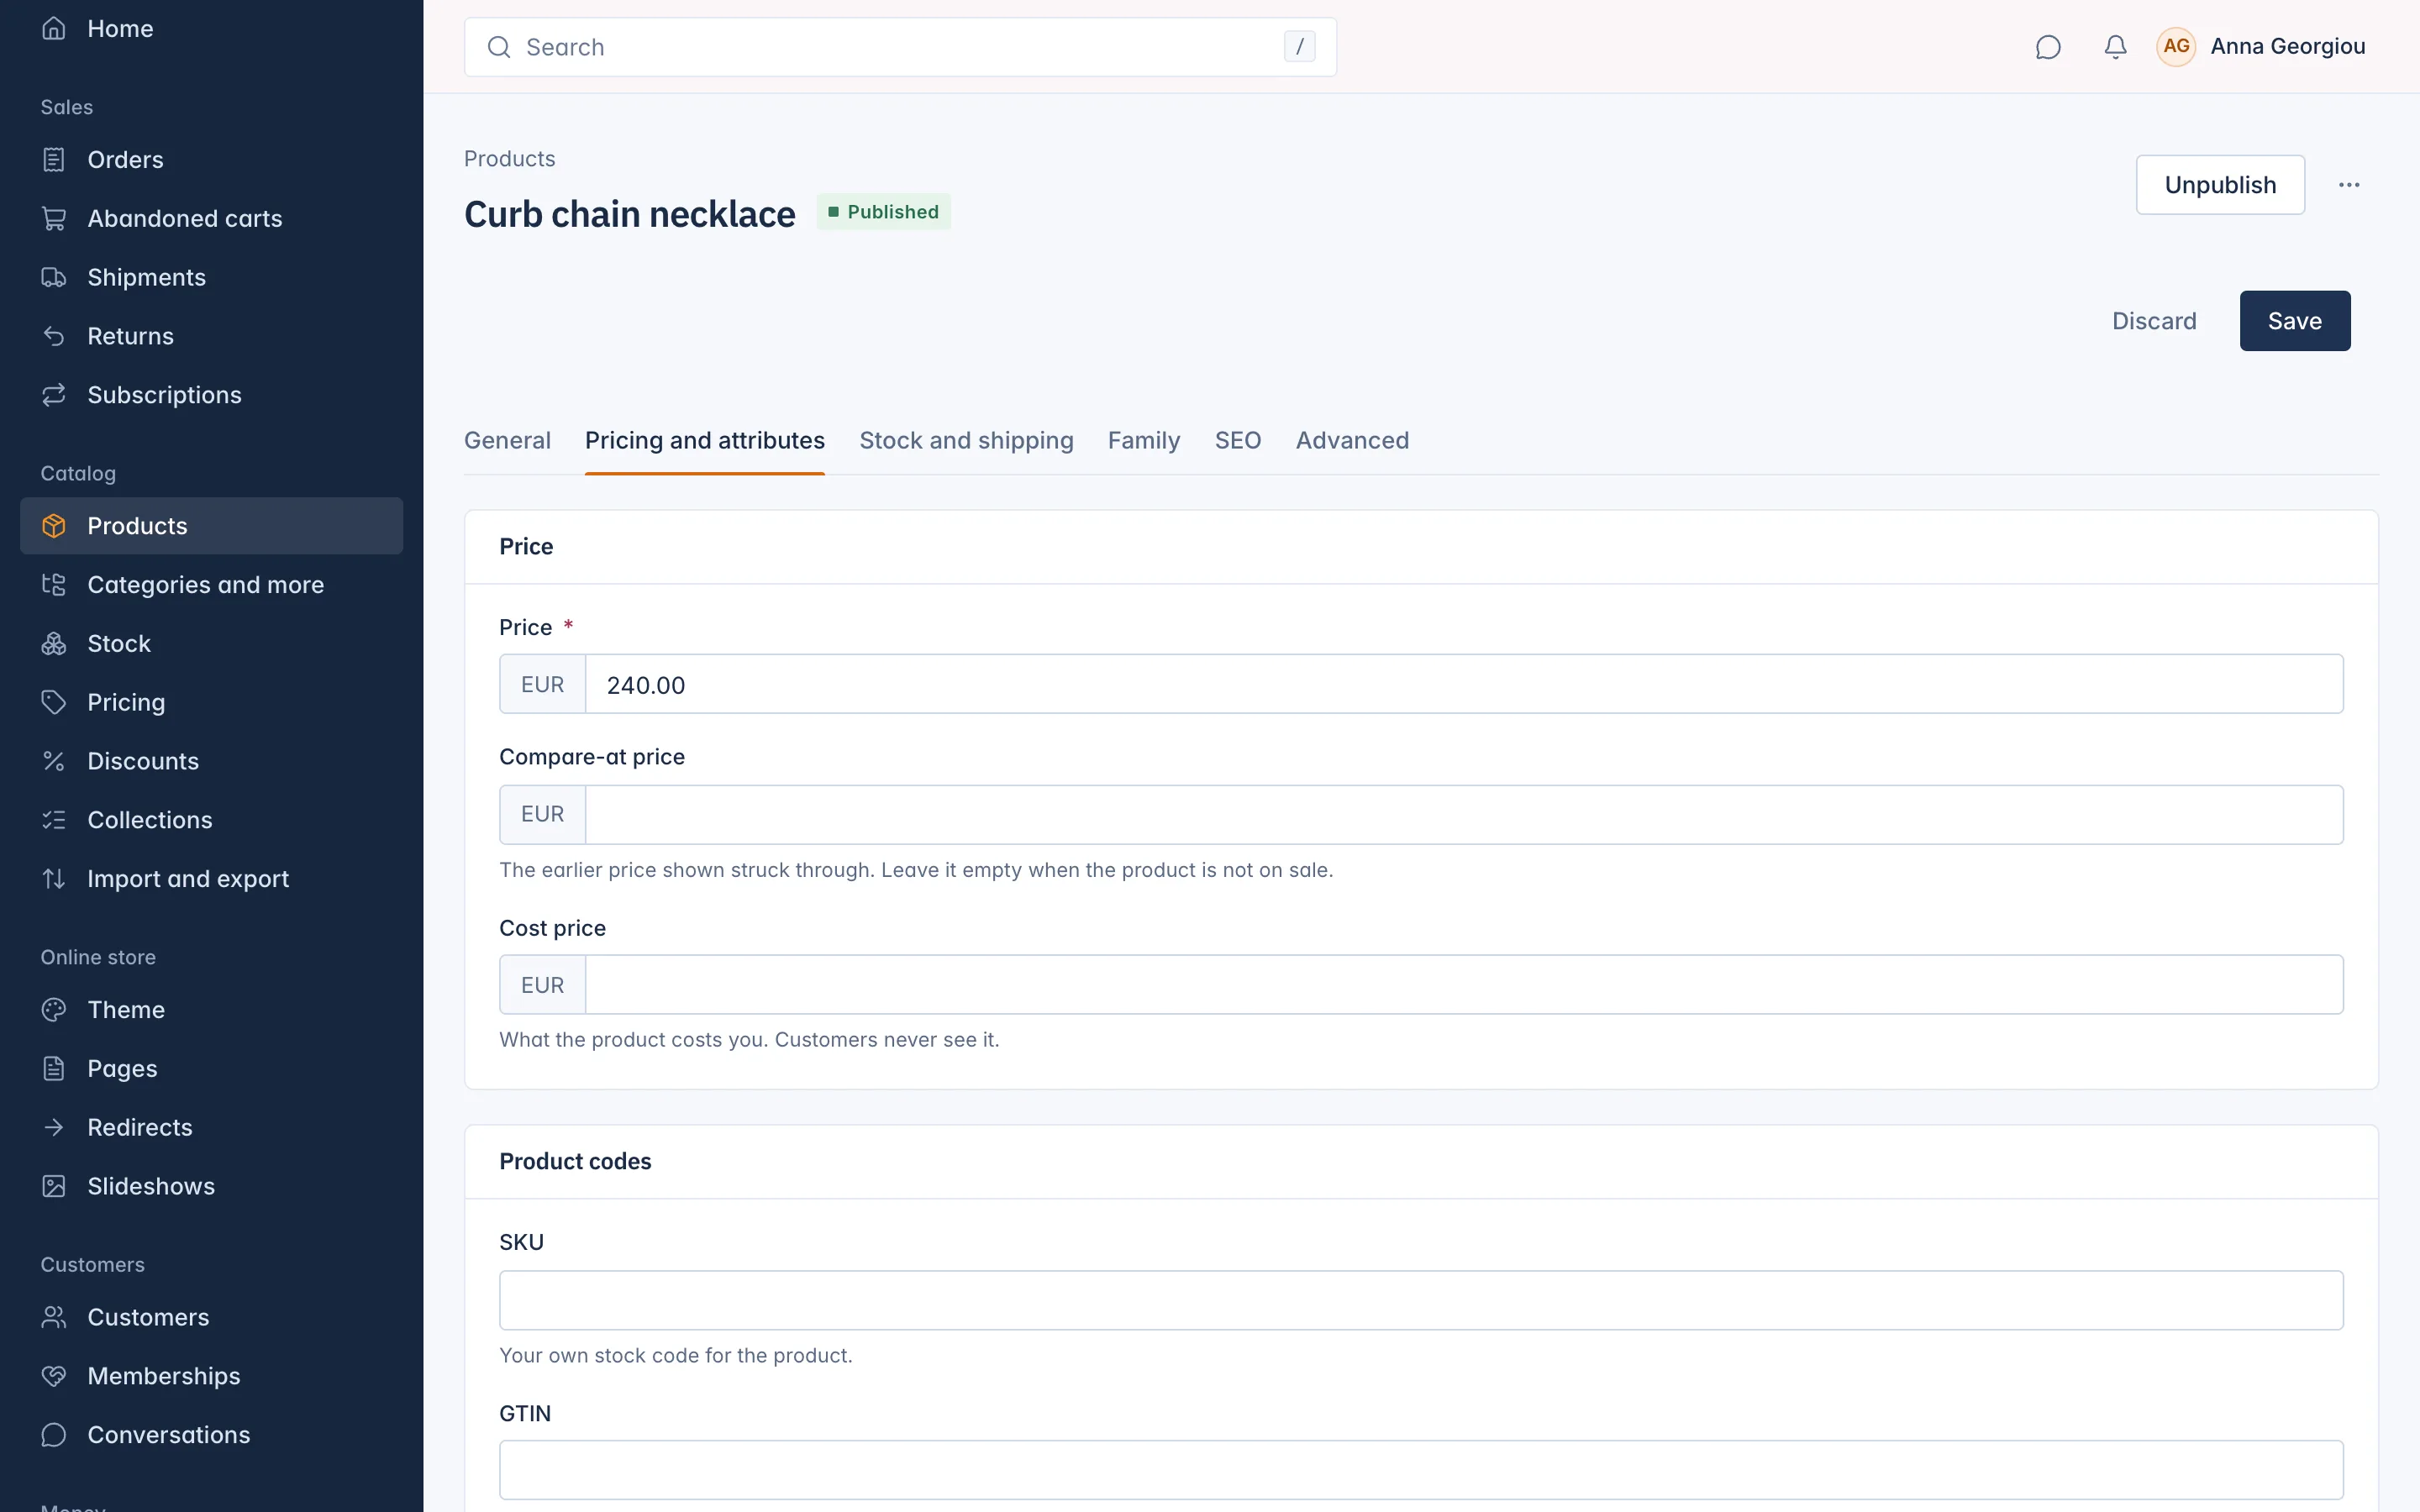
Sizes, colours and other choices are added further down this tab under Attributes and Combinations. See Catalog when you need them.
3. Add photos
Go back to the General tab. Once the product is saved, a Photos card appears there. Add your pictures, put them in order, write a short Text for screen readers for each one (it describes the photo for people who cannot see it, and helps search engines), and press Save photos.
4. Set the stock
On Stock and shipping:
- Track stock on means the shop counts what you have and stops selling when none is left. Leave it off for products you can always supply.
- In Stock per location, type how many you have in On hand. Type
37to set the number,+5or-3to change it. Each location saves on its own. - Sell when out of stock lets customers keep ordering when the count reaches zero; you ship when new stock arrives.
- Add the Weight if your shipping prices depend on weight. A product without a weight counts as weightless.
If the tab says No stock location, add a stock location under Settings first.
5. Publish
When the product has a title and a price, press Publish at the top of the product. Its status changes to Published and it appears in your shop (once the shop is live).
If something is missing, Publish says what, with a link to the tab to fix, for example Give the product a price, and every choice of its own stock too.
Save and Discard at the top save or throw away your changes to the fields. Photos, attributes, combinations, product tabs and stock save on their own.
To check the result, open More (the three dots) and choose View in shop.
Good to know
- Unpublish turns a product back into a draft. Archive (under More) takes it out of the shop and every list but keeps it for its orders.
- Duplicate (under More) makes a draft copy, handy for similar products.
- Delete removes a product for good, but a product that was ever ordered cannot be deleted: archive it instead.
- The Set up your shop card on Home ticks First product off once a product is published with stock, or with stock not counted.
Related
Updated 13 November 2026