
Set up the seller application form
Multi-VendorChoose which fixed fields a seller must fill in when it applies, and add up to 10 questions of your own.
In the admin: SettingsSeller application form
The seller application form is what a business fills in to apply to sell in your marketplace. Use this screen to decide which details are required, optional or not asked at all, and to add your own questions, for example about the products a seller makes. The same choices decide which legal and tax fields are required when you create a seller yourself.
Open it from Settings, in the Marketplace group, under Seller application form. Changing it needs the right to manage marketplace settings.
Fixed fields
The Fixed fields card holds the questions every application asks.
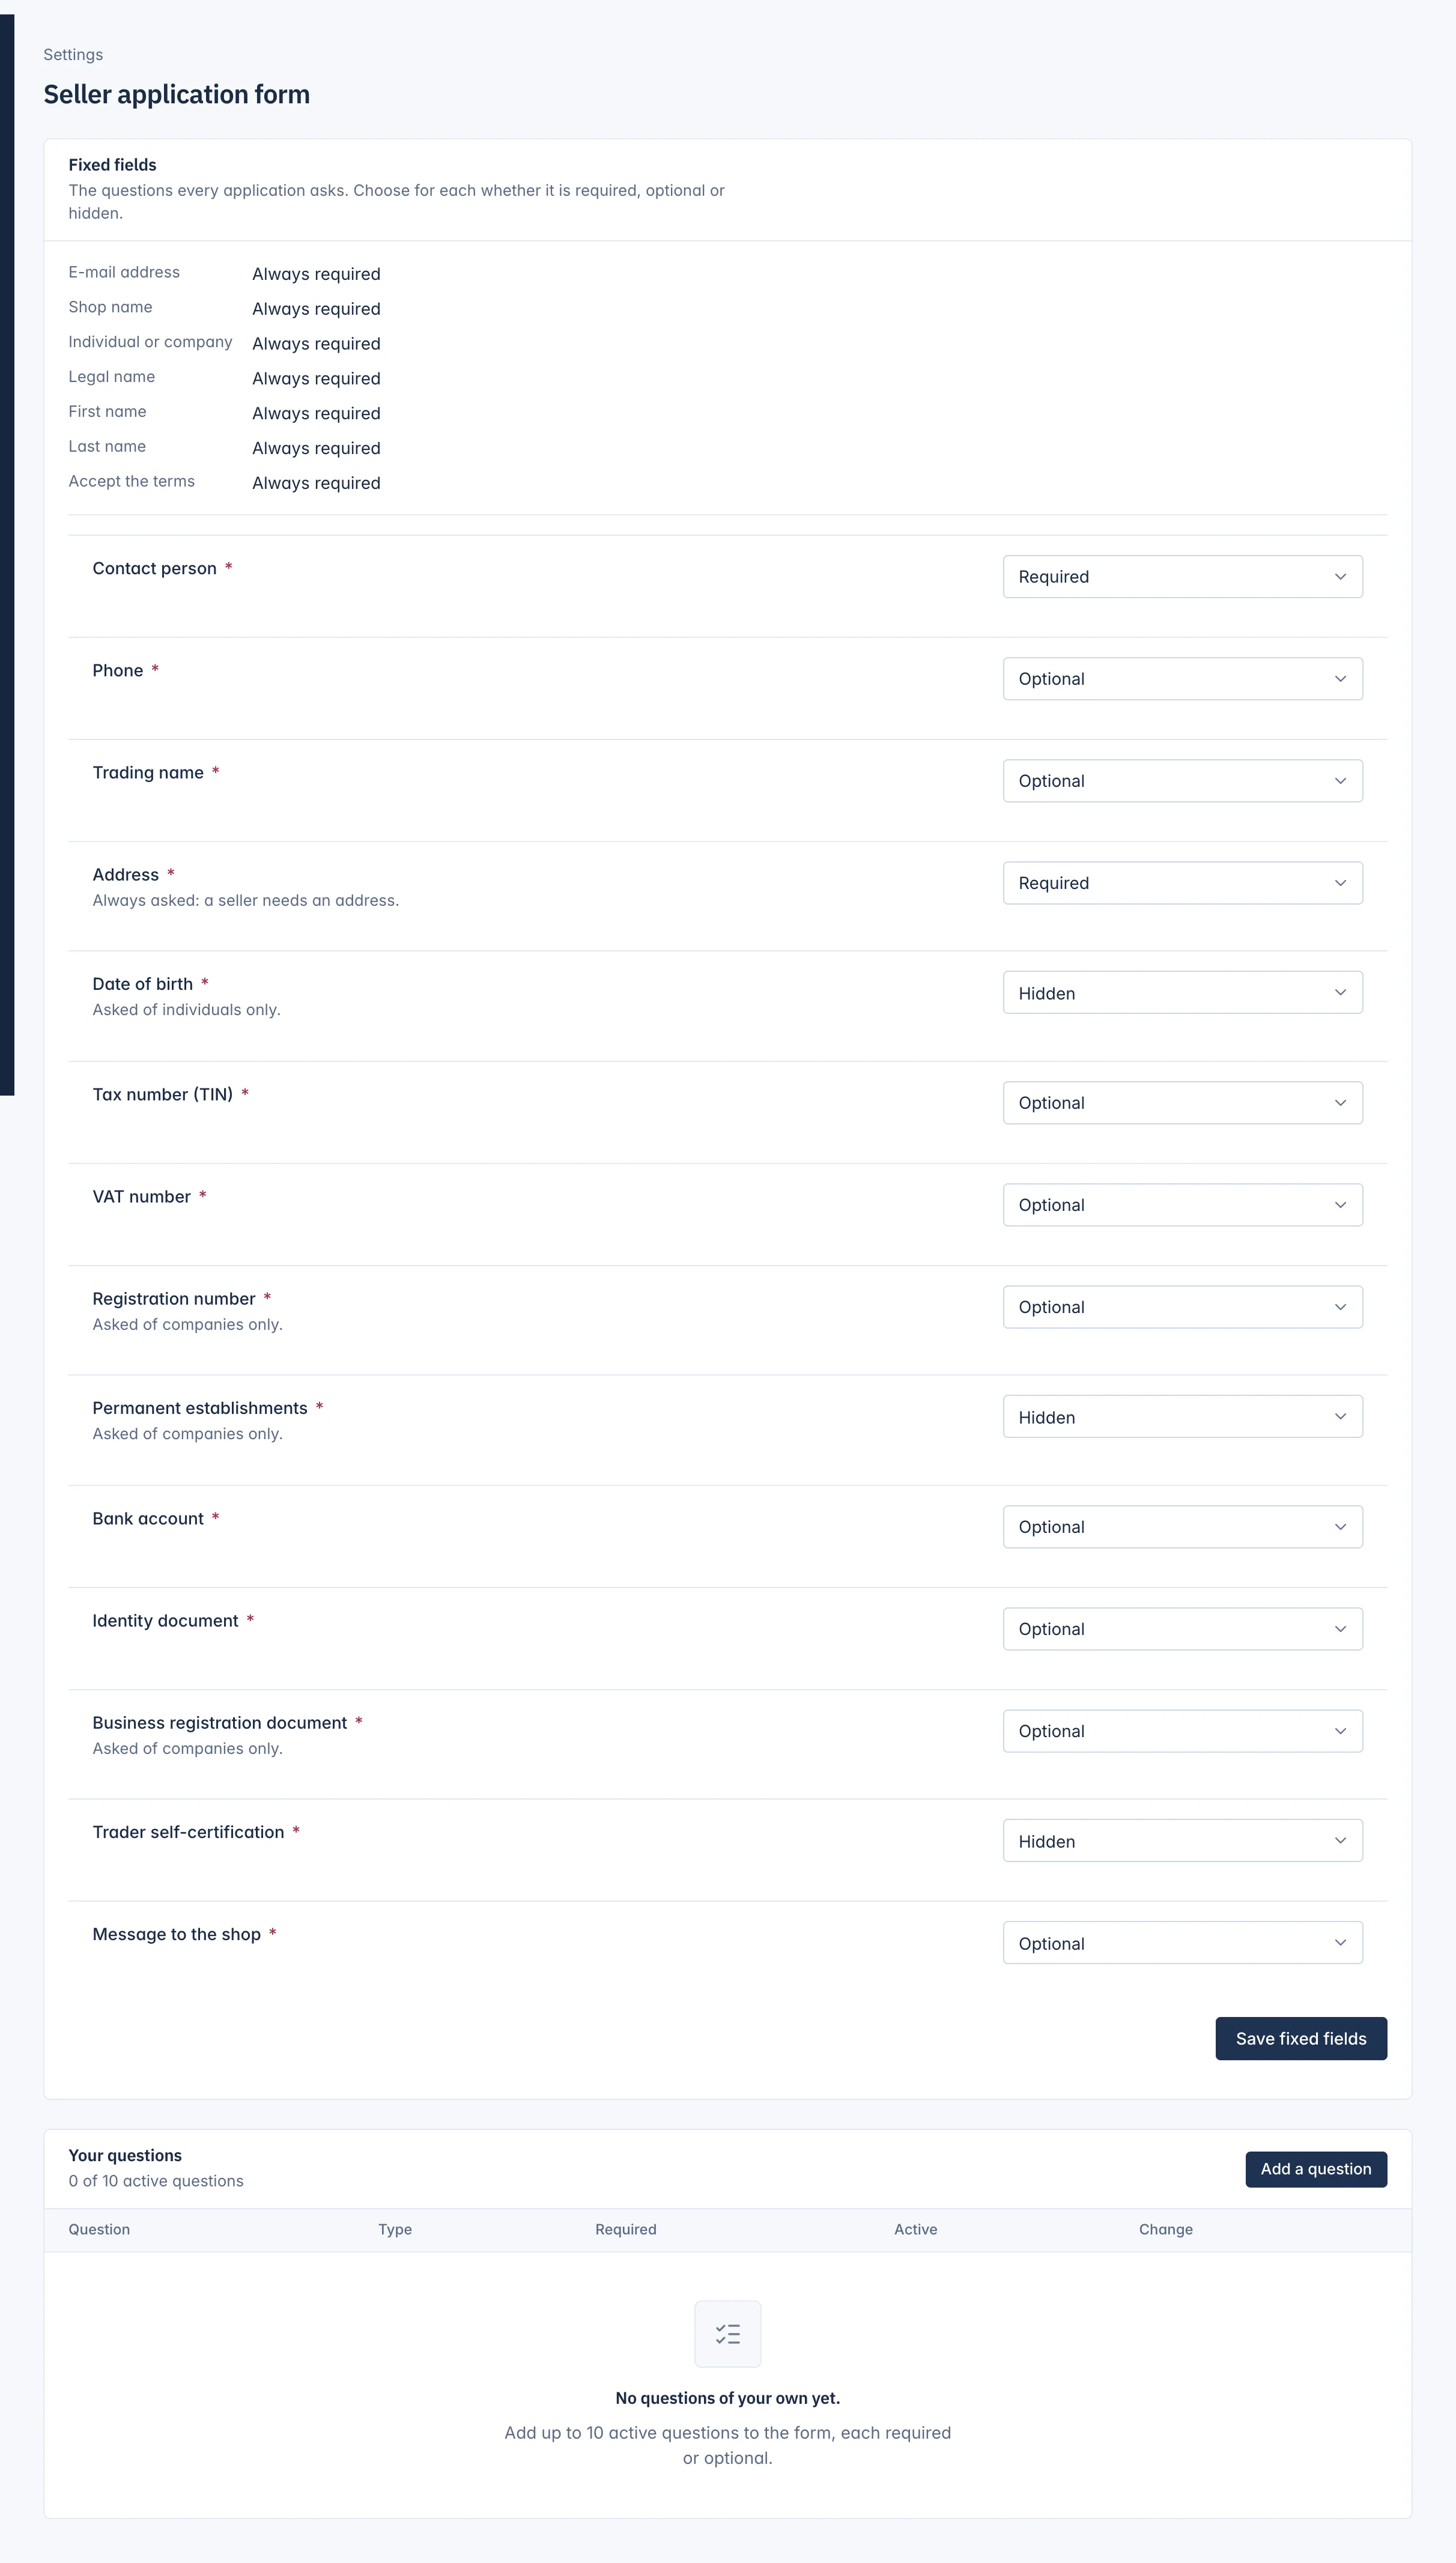
Some fields are always asked and show Always required: E-mail address, Shop name, Individual or company, Legal name (companies), First name and Last name (individuals), and Accept the terms.
For every other field choose Required, Optional or Hidden, then press Save fixed fields:
| Field | Default | Notes |
|---|---|---|
| Contact person | Required | |
| Phone | Optional | |
| Trading name | Optional | |
| Address | Required | Always asked: a seller needs an address. It can be optional but never hidden. |
| Date of birth | Hidden | Asked of individuals only. |
| Tax number (TIN) | Optional | |
| VAT number | Optional | |
| Registration number | Optional | Asked of companies only. |
| Permanent establishments | Hidden | Asked of companies only. |
| Bank account | Optional | |
| Identity document | Optional | A file upload. |
| Business registration document | Optional | A file upload, asked of companies only. |
| Trader self-certification | Hidden | |
| Message to the shop | Optional |
A field marked for companies only is never shown to an individual, and the other way round, whatever you choose.
Think about your selling mode too. In Reseller mode a seller cannot sell until it has given its legal name, full address, a tax or VAT number, and an IBAN with its account holder. Making those fields required here saves a round of chasing after approval.
Your questions
The Your questions card lists the questions you added, in the order the form shows them, with their Type and whether each is Required and Active. Up to 10 questions can be active at once; the card shows how many are.
Add a question
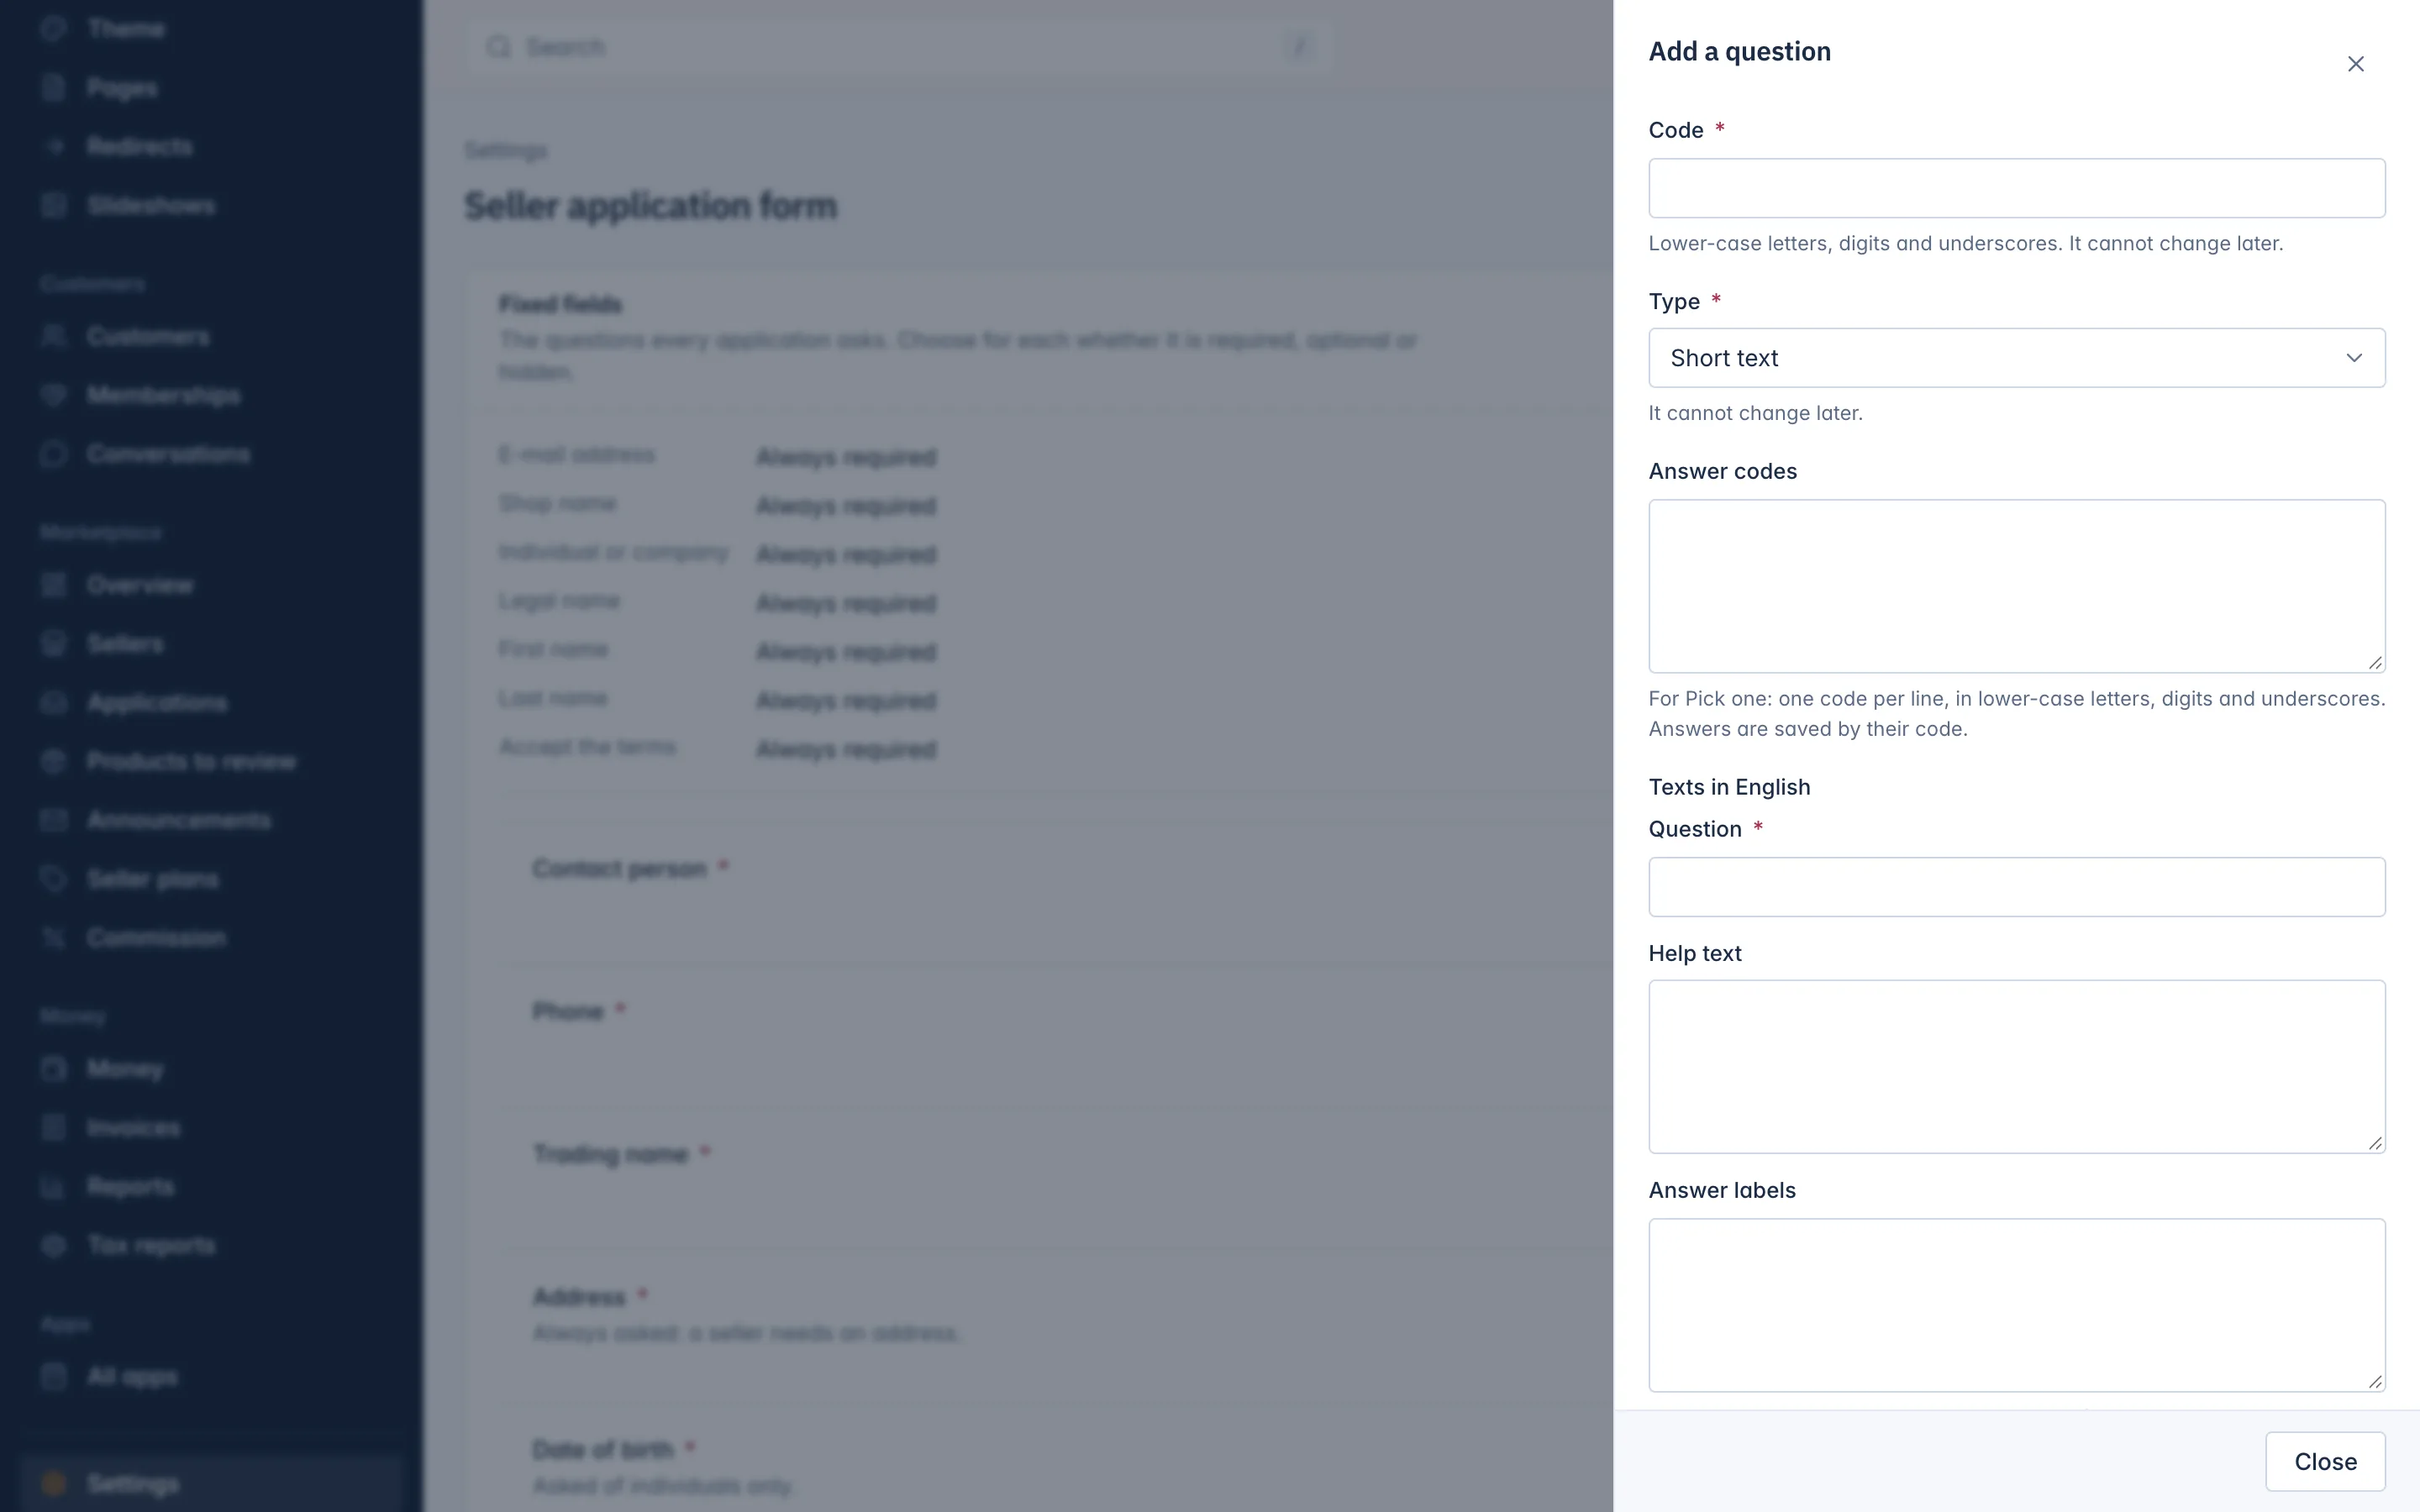
- Press Add a question.
- Type a Code: lower-case letters, digits and underscores, for example
product_range. It is how answers are stored and cannot change later. Choose the Type. It cannot change later either.
- Short text and Long text for a written answer.
- Yes / no for a question answered with Yes or No.
- Pick one for a choice from your own list.
- File for an upload, such as a price list or a certificate.
- For Pick one, list the Answer codes, one per line, in lower-case letters, digits and underscores.
- Under Texts in your main language, write the Question and, if useful, a Help text shown under it. For Pick one, write the Answer labels, one per line, in the same order as the answer codes. Other languages may stay empty; the form then shows the main language's text.
- Tick Required if the applicant must answer it, and Active to show it on the form.
- Press Save question.
Change, reorder or remove questions
- Edit opens the question. Its code and type are shown but cannot change. To keep a question for later without showing it, untick Active.
- The arrows move a question up or down the form.
- Delete takes the question off the form. Applications already sent keep their answer to it.
The answers appear on each application under Your questions, and on the seller's Application and documents tab after approval. See Review seller applications.
Related
Updated 13 November 2026