
Add and invite sellers
Multi-VendorFind sellers on the Sellers list, invite a seller to apply by e-mail, or create a seller yourself without an application.
In the admin: MarketplaceSellers
On this page
A seller is a business that sells its own products in your marketplace. Sellers join in three ways: they apply from your storefront, you invite them to apply, or you create them yourself. This article covers the Sellers list and the two ways you start yourself. For applications sent from your storefront, see Review seller applications.
The Sellers list
Marketplace > Sellers lists every seller with its plan, status, sales this month, live products and the day it joined. Click a name to open the seller's page.
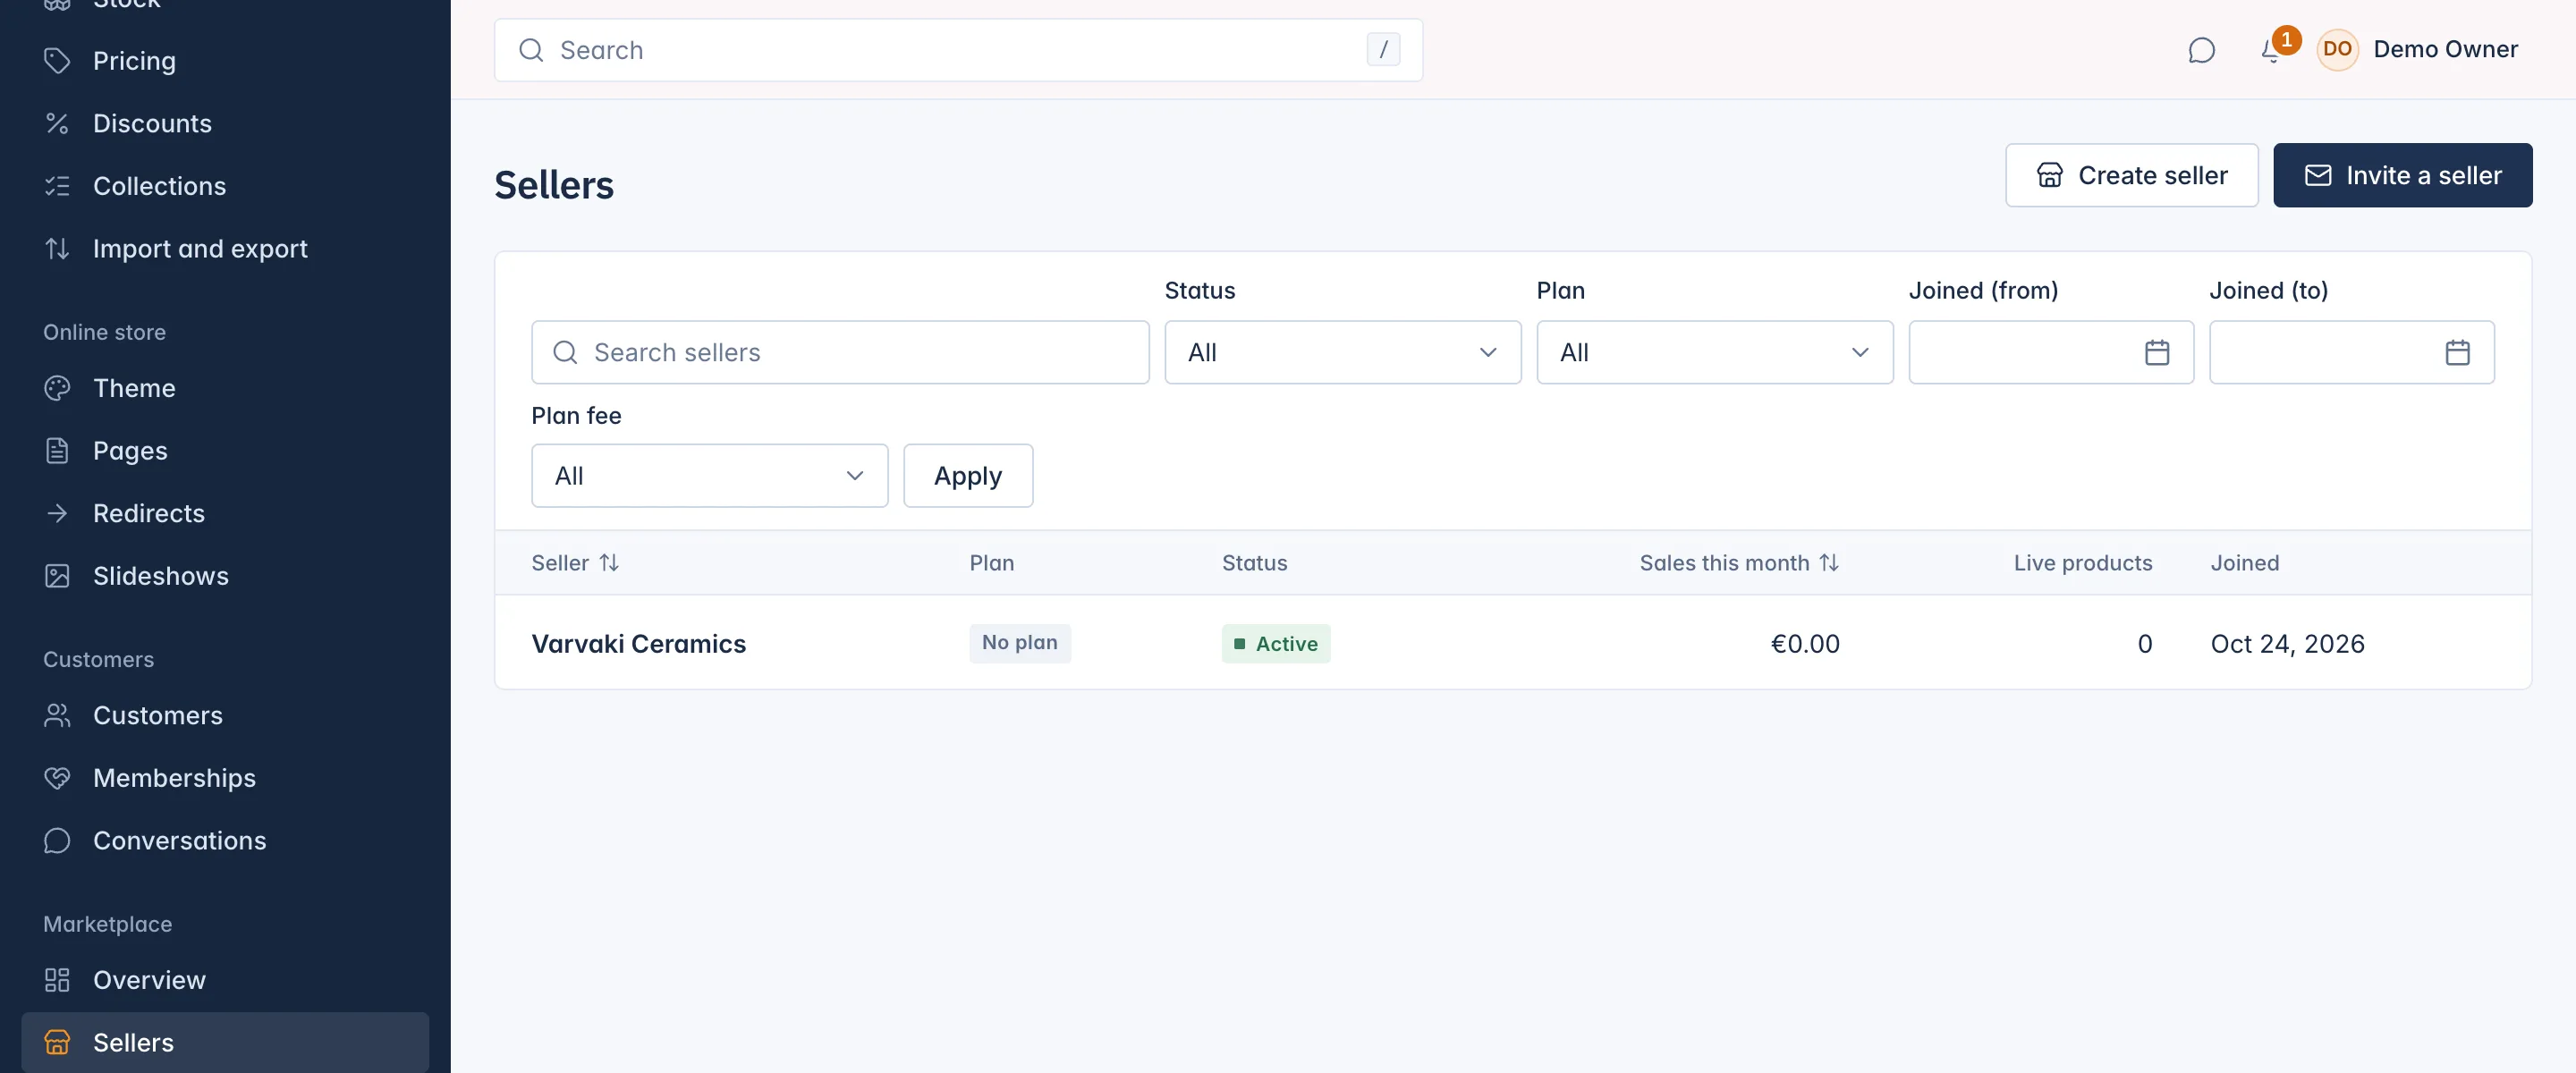
The Status column shows:
| Status | Meaning |
|---|---|
| Pending | Has applied and is not approved yet. |
| Active | The seller may sell. |
| Suspended | The seller's products are out of the shop. A second badge says why: For an unpaid plan fee, Plan cancelled or By staff. |
| Closed | Closed for good. |
The Plan column shows the seller plan, with Free when you gave it free of charge, Cancelled for an ended plan, or No plan. Sales this month is shown only to people who may see marketplace reports, and is never converted between currencies.
Use the filters to narrow the list: Search sellers (at least 2 letters), Status, Plan, Joined (from and to) and Plan fee set to Unpaid plan fee to find sellers who owe you a fee.
Your own products are sold by the house seller, which is not on this list.
Invite a seller to apply
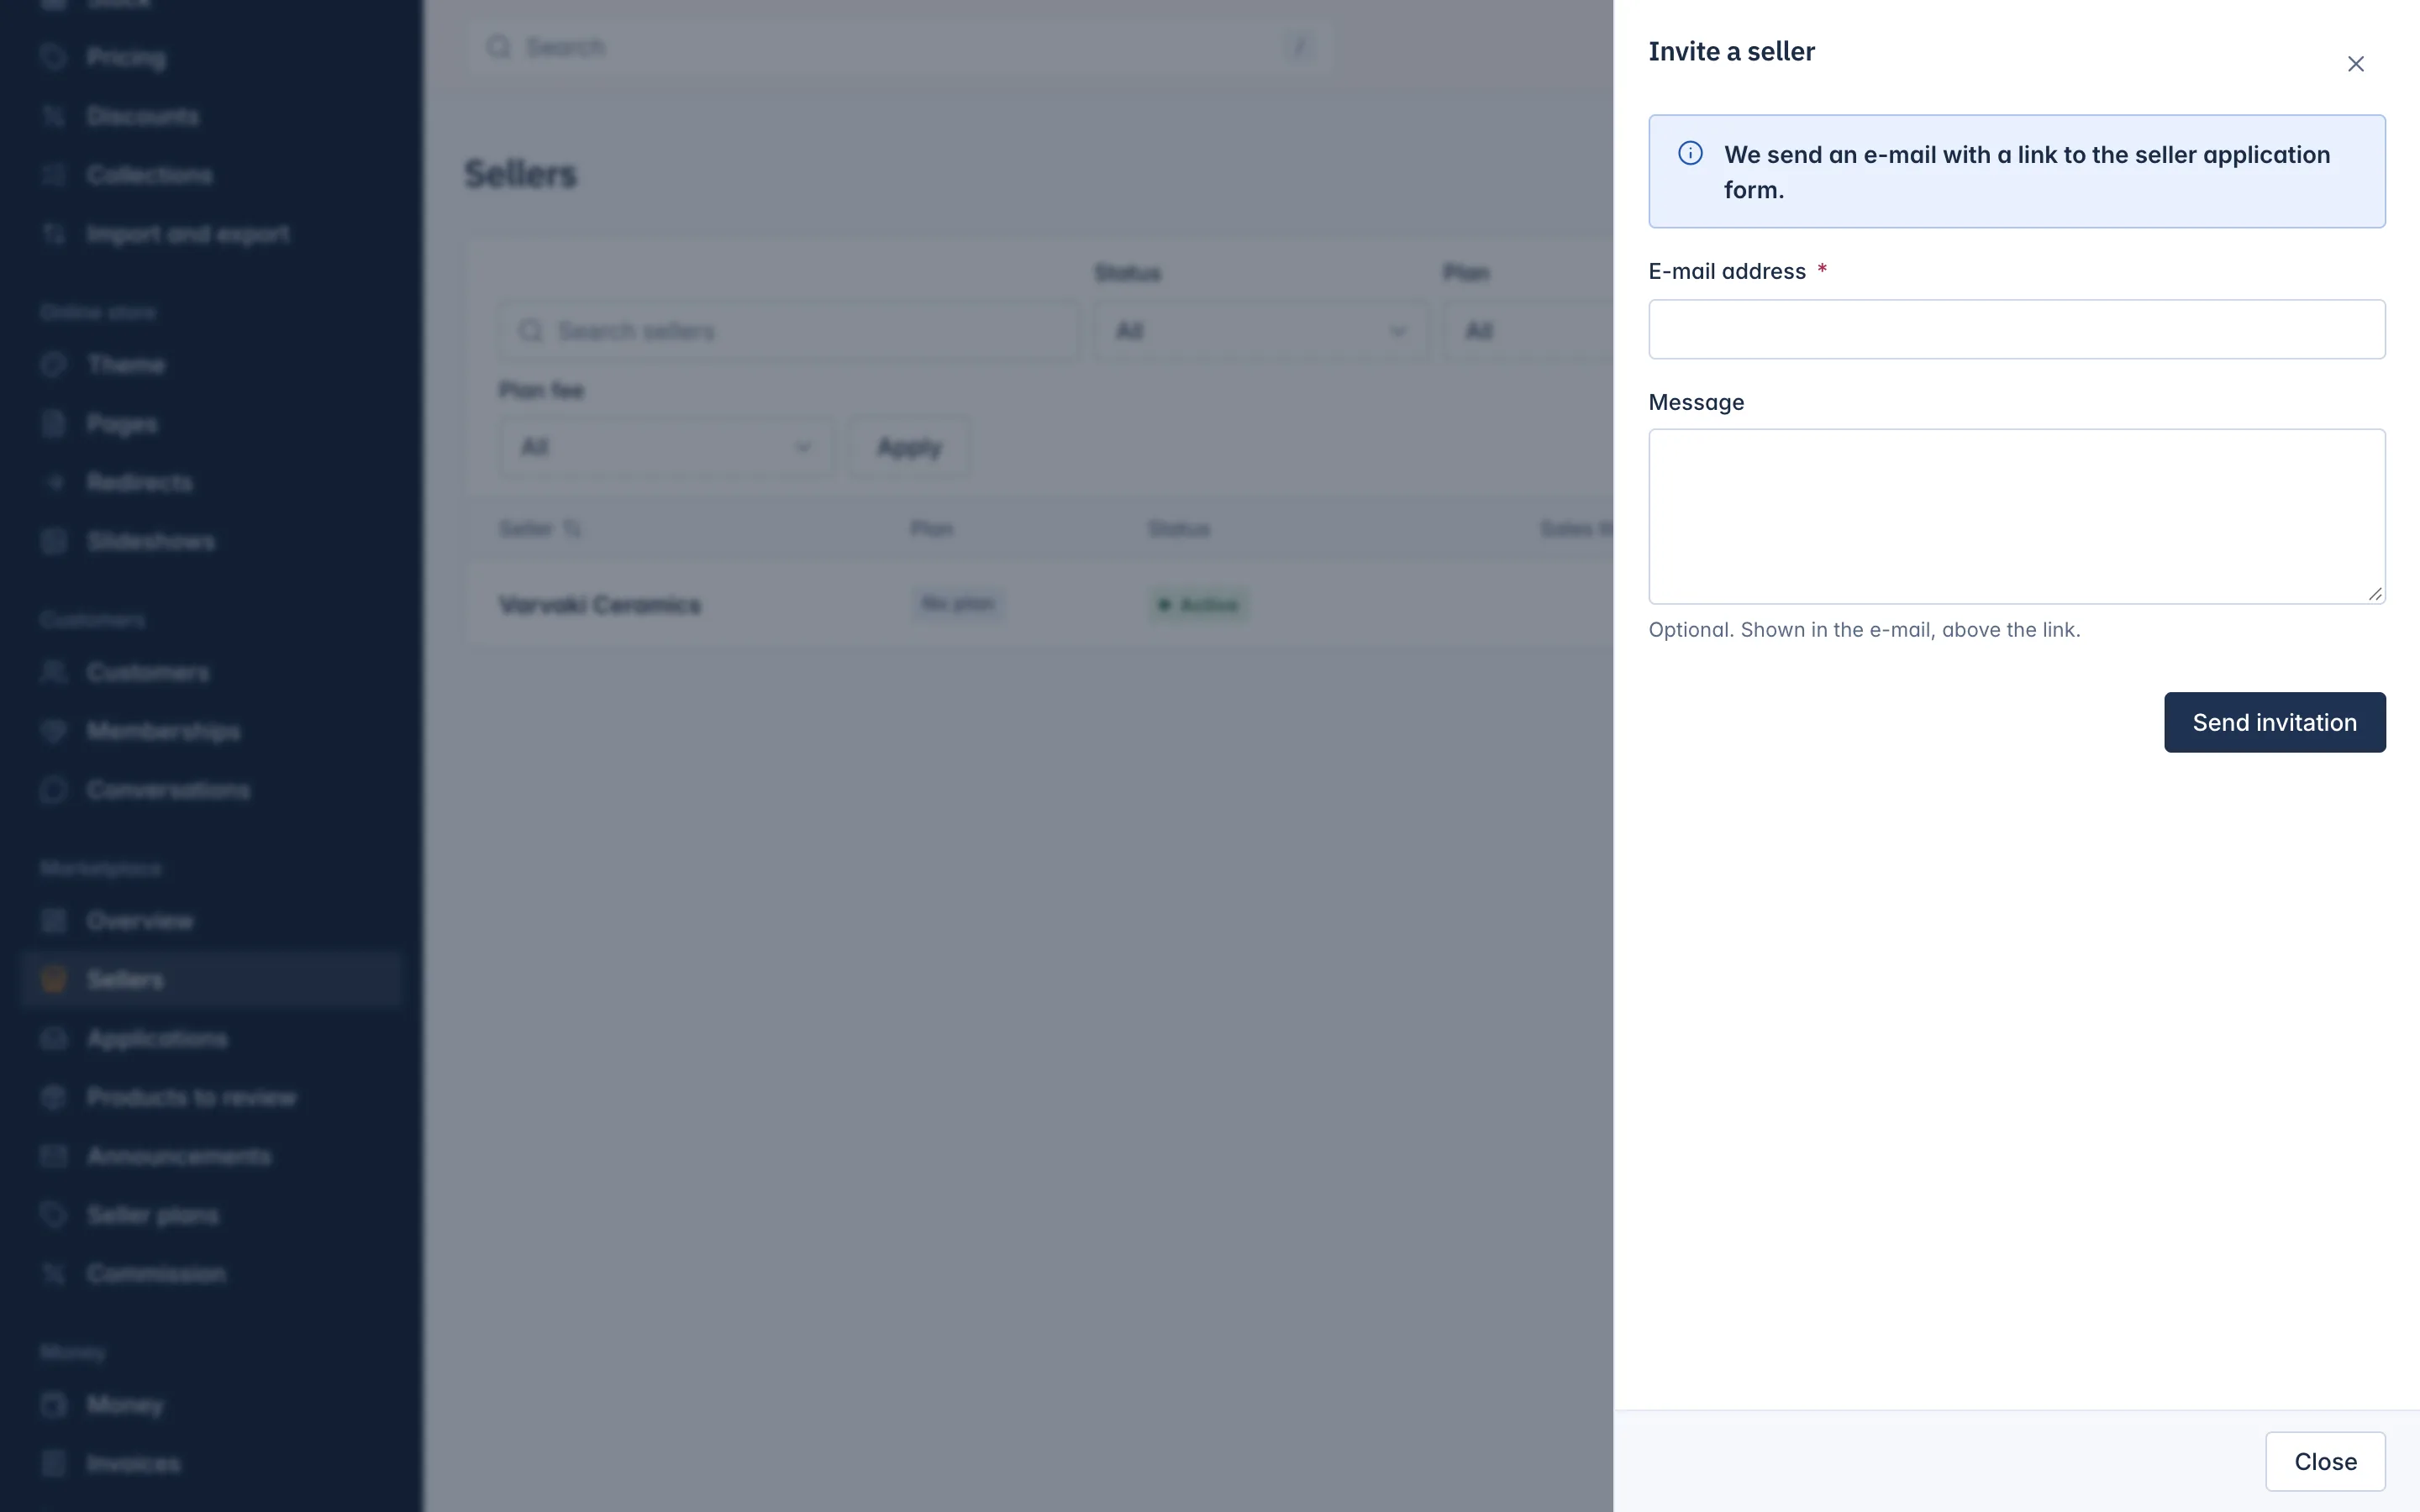
An invitation is an e-mail with a link to your seller application form. The seller fills in the form and you then approve or decline it, like any application.
- Go to Marketplace > Sellers and press Invite a seller.
- Type the seller's E-mail address.
- Optionally write a Message. It is shown in the e-mail, above the link.
- Press Send invitation.
The application then appears under Marketplace > Applications once the seller sends it.
Create a seller yourself
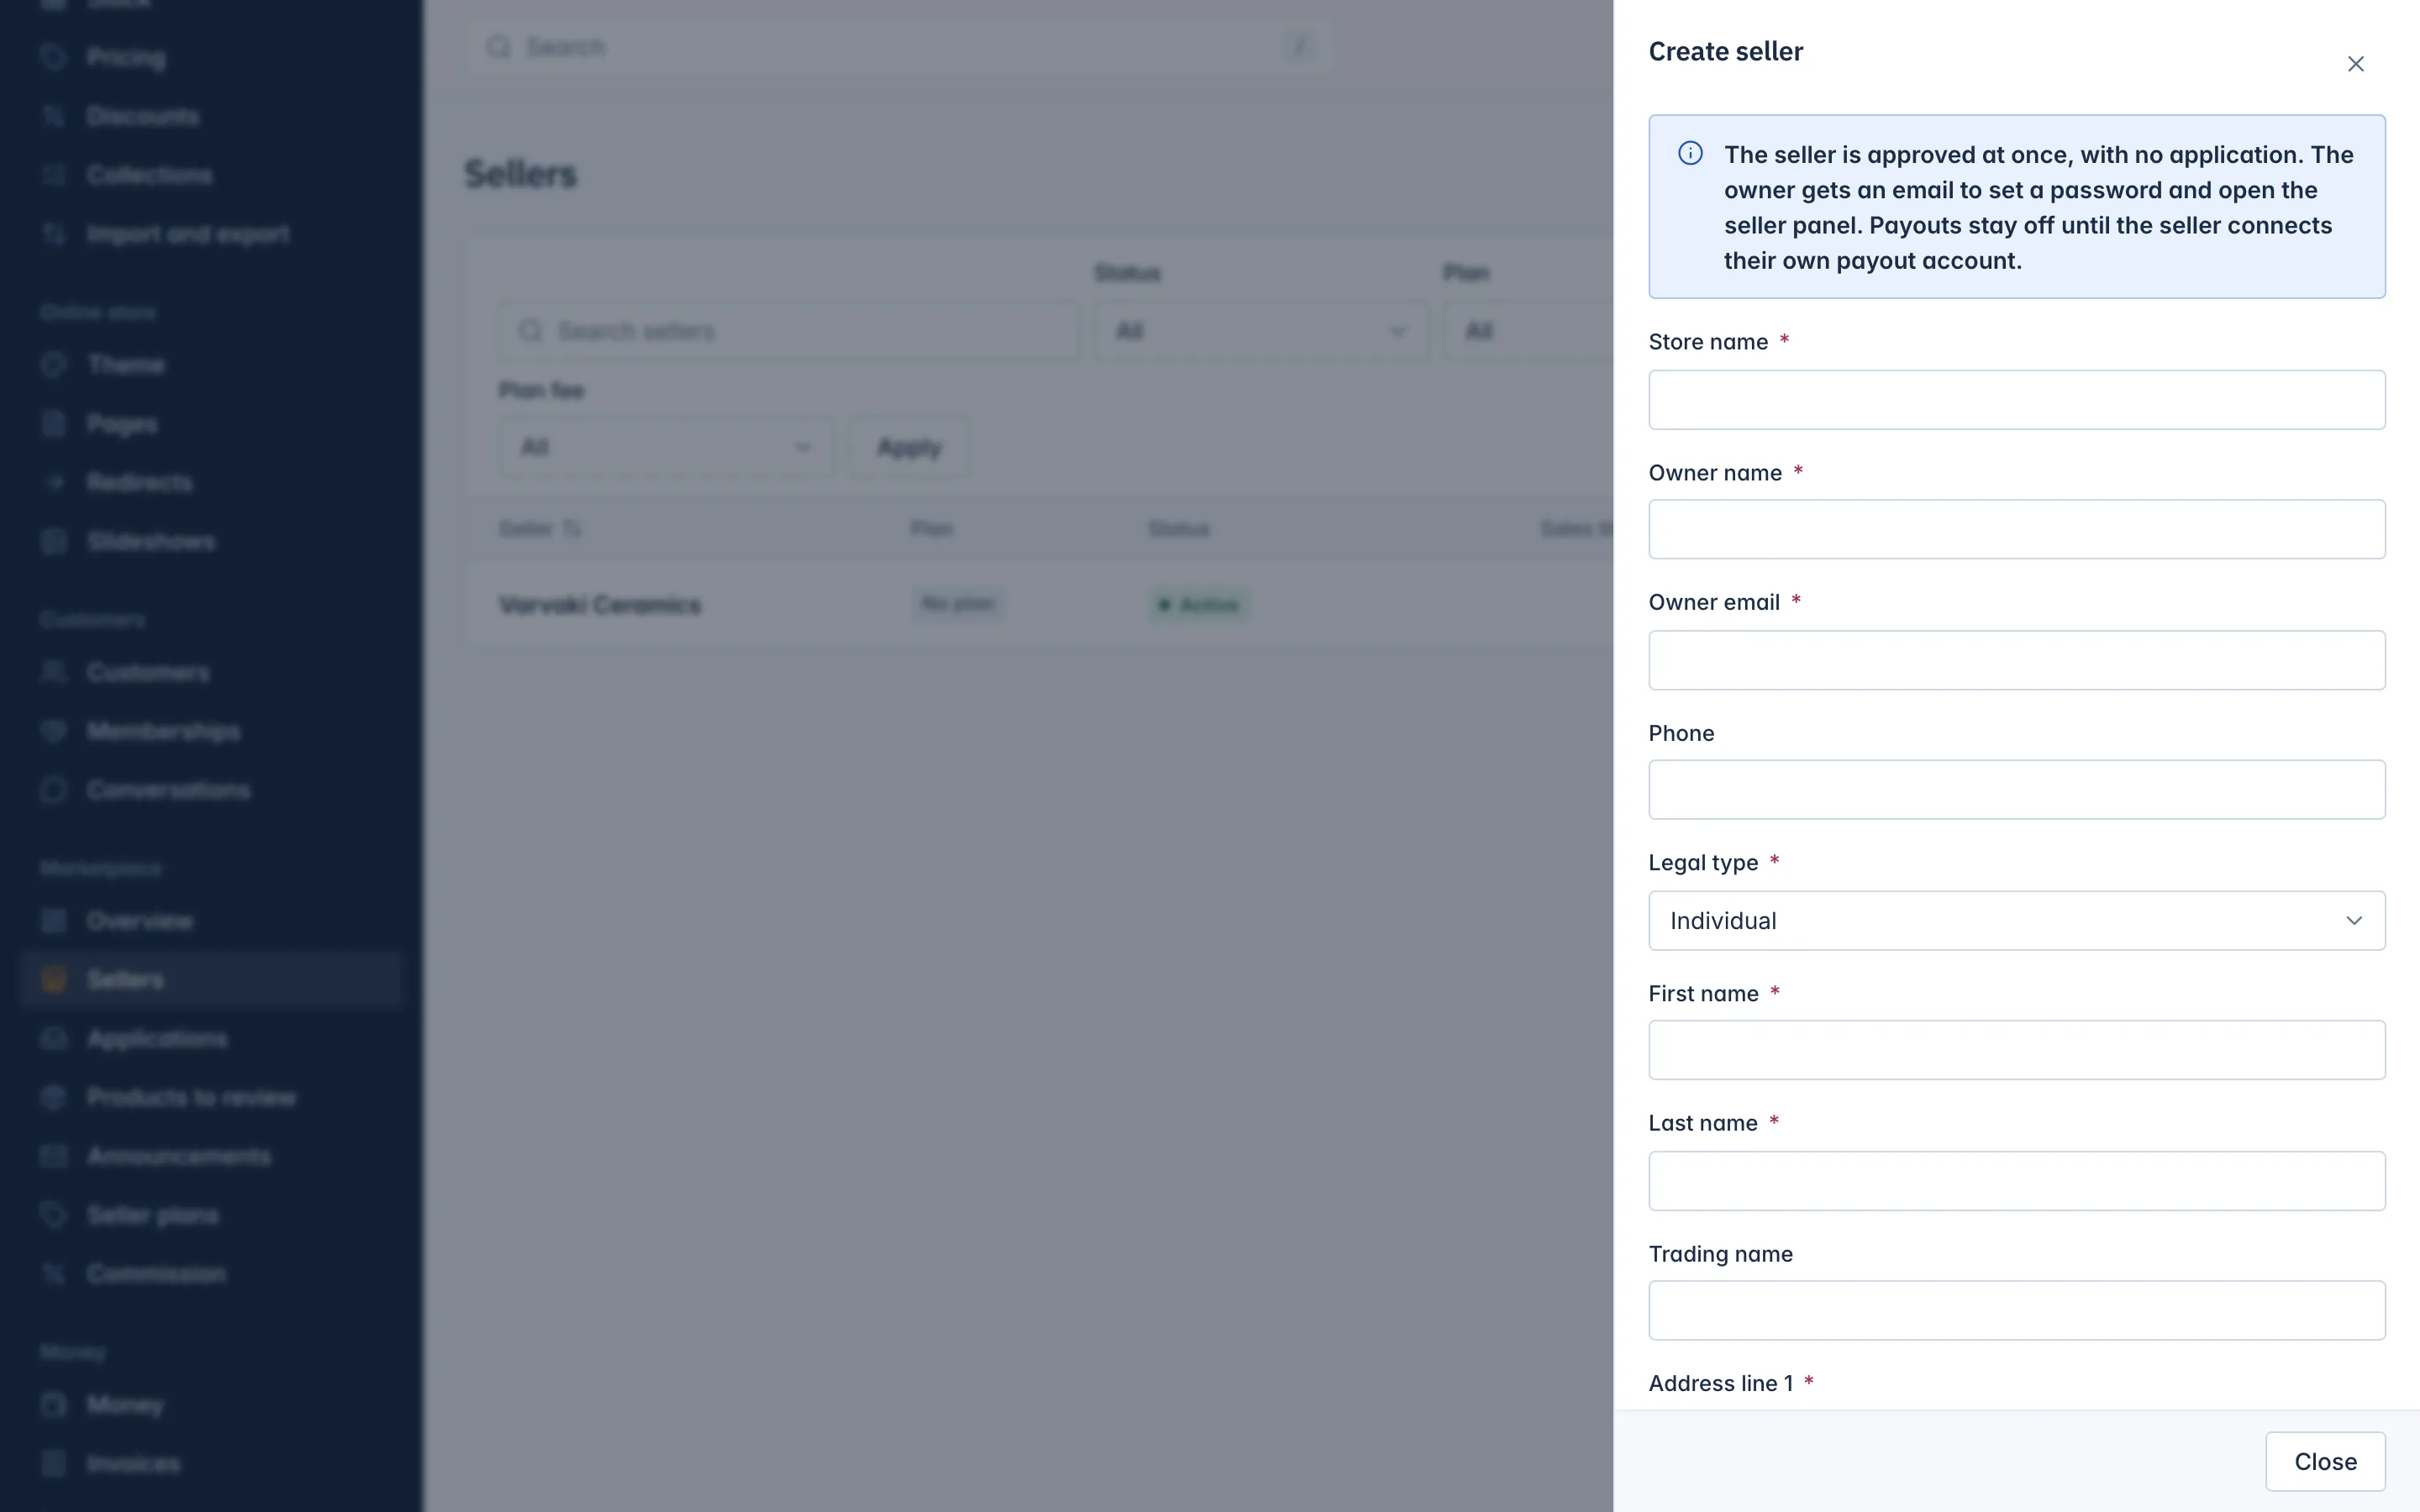
Create seller adds a seller with no application, for example a business you signed up in person. The seller is approved at once. Its owner gets an e-mail to set a password and open the seller panel.
- Go to Marketplace > Sellers and press Create seller.
- Fill in the Store name, Owner name and Owner email, and optionally a Phone.
- Choose the Legal type: Individual or Company. The fields below change with it.
- Fill in the legal and tax fields: for a company the Company legal name, for an individual the First name and Last name, then the address, Tax number and Tax number country, VAT number, Registration number and Register name, IBAN and Account holder. Which ones are required follows your seller application form.
- If you have seller plans, choose the Seller plan. Your default plan is chosen for you.
- Press Create seller.
Each store name and owner e-mail can belong to one seller only. A duplicate is refused with "Another seller already uses this store name." or "Another seller already uses this email."
When your shop sends no e-mail yet
If outgoing e-mail is not set up, the owner never receives the set-password e-mail. You have two ways round it on the seller's page:
- On the Team tab, press Get invite link beside the open invitation. Send the link to the seller yourself, for example by chat. It works for 7 days and is shown only once; any older link stops working.
- On the General tab, press Activate owner without e-mail. The owner's login becomes active at once, so you can use Log in as seller. The owner chooses a password later with "Forgot password" on the seller sign-in page.
Related
Updated 13 November 2026