
Review seller applications
Multi-VendorHow businesses apply to sell in your marketplace, and how to read an application, open its documents, and approve or decline it.
In the admin: MarketplaceApplications
On this page
Most sellers join your marketplace by applying. They fill in your seller application form, and your team approves or declines each application in Marketplace > Applications. This article explains how sellers apply and how to decide. To change what the form asks, see Set up the seller application form.
How a business applies
- The business opens your storefront's application page, at your shop's address followed by
/seller-application, or the link in an invitation you sent from Marketplace > Sellers. - It types its e-mail address and gets a private link to its application by e-mail.
- It fills in the form: shop name, contact, legal and tax details, documents, your own questions and, if you offer several, the seller plan it wants. It accepts your terms and sends the application.
- The application appears on the Submitted tab of Marketplace > Applications, and its count shows on Marketplace > Overview under Applications to decide.
By default anyone may apply, and every application waits for a person on your team to decide.
The Applications list
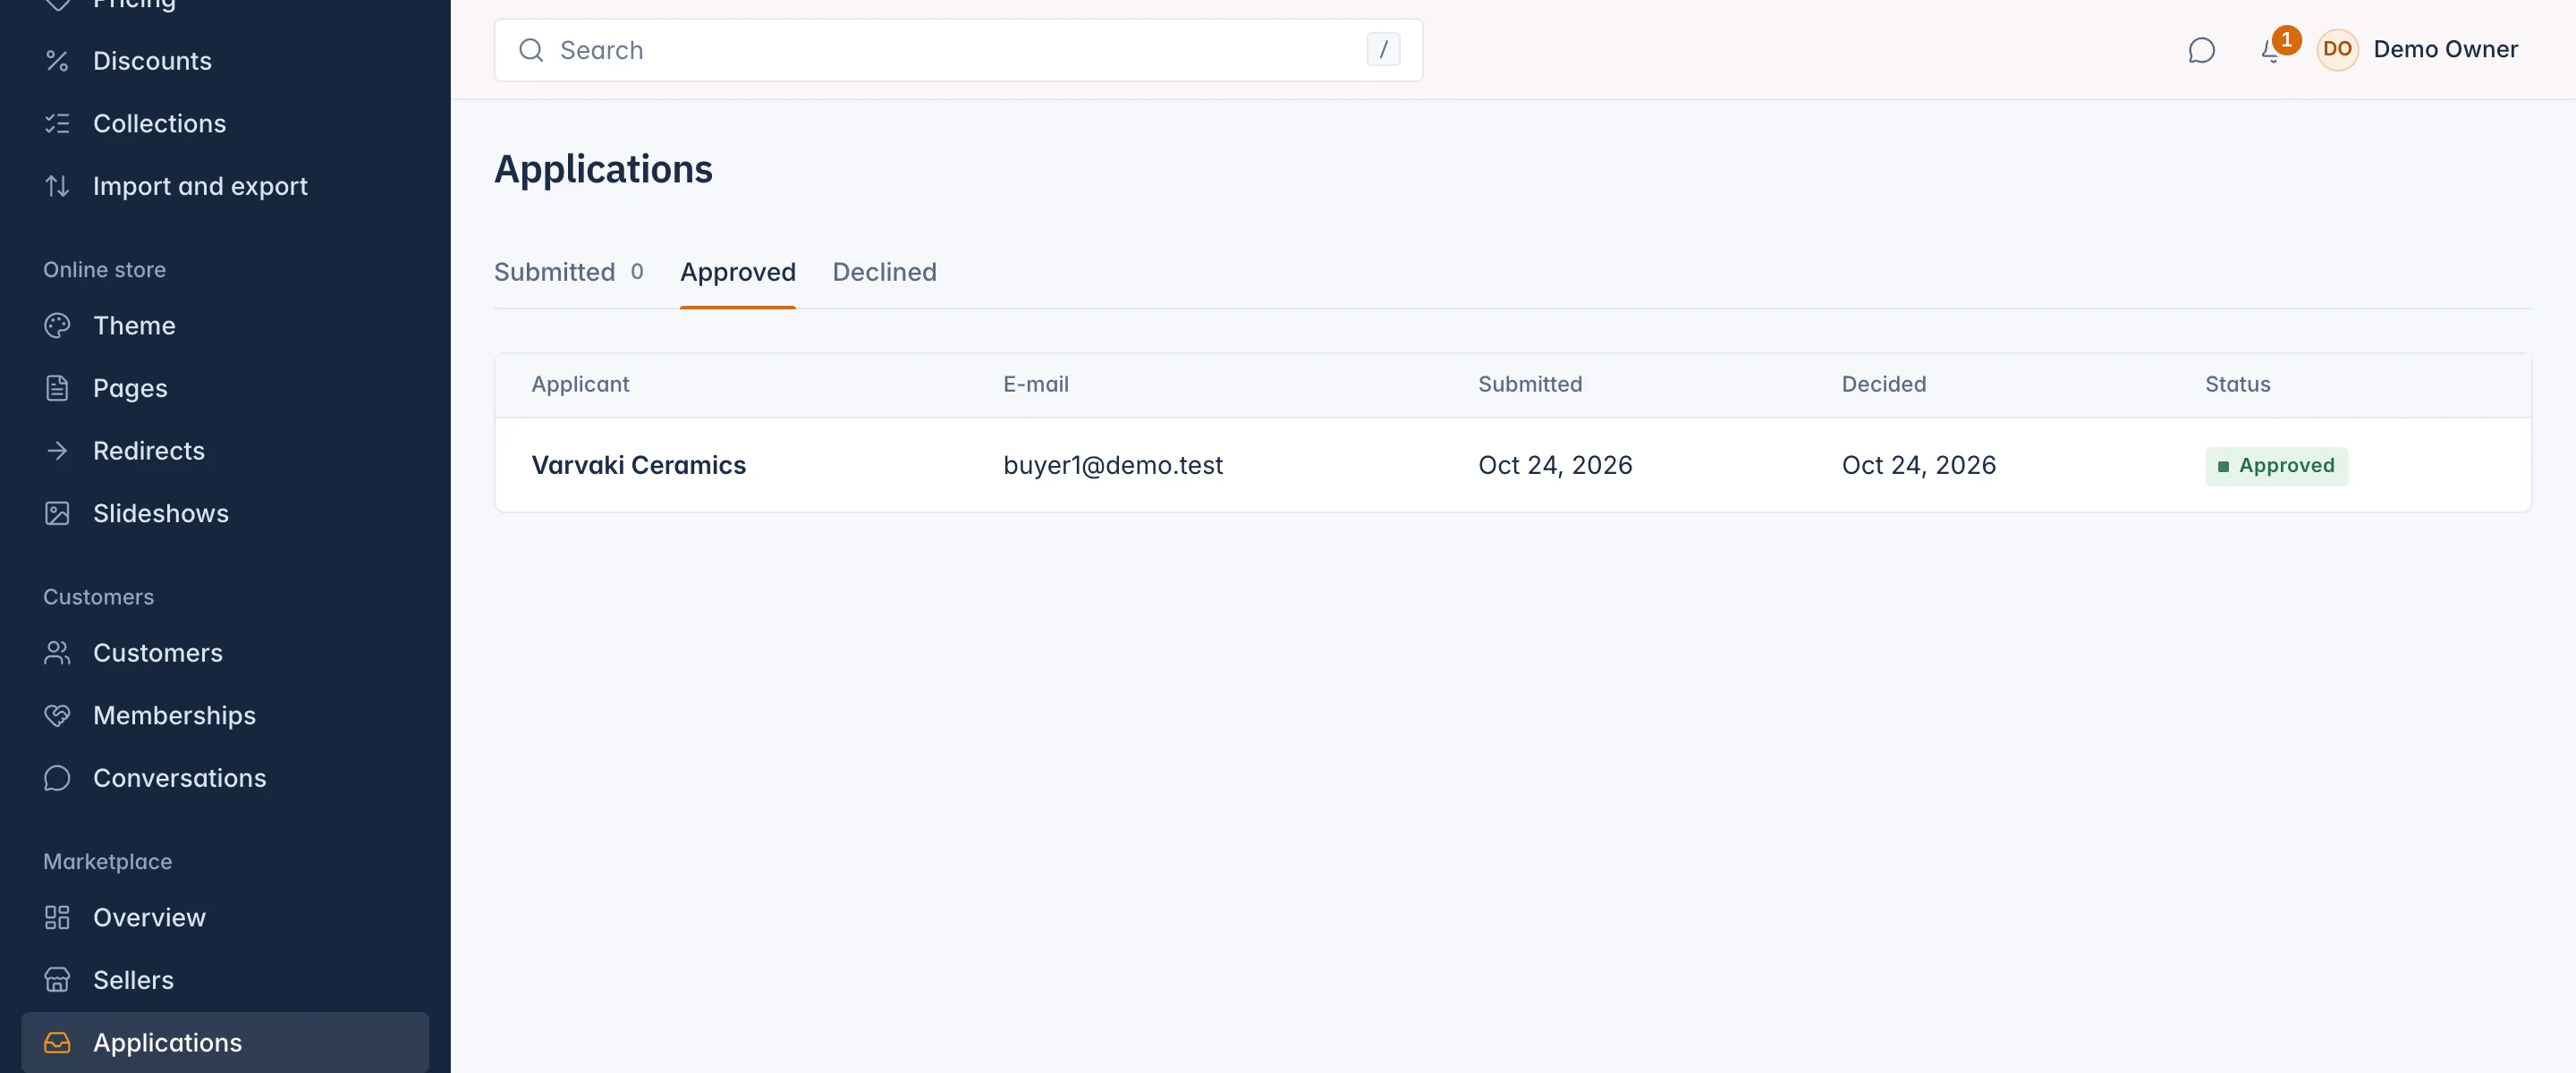
The list has three tabs:
- Submitted: applications waiting for a decision, the oldest first.
- Approved and Declined: the history, the newest decision first.
Each row shows the Applicant, E-mail, when it was Submitted, when it was Decided and its Status. Click the applicant to open the application.
Read an application
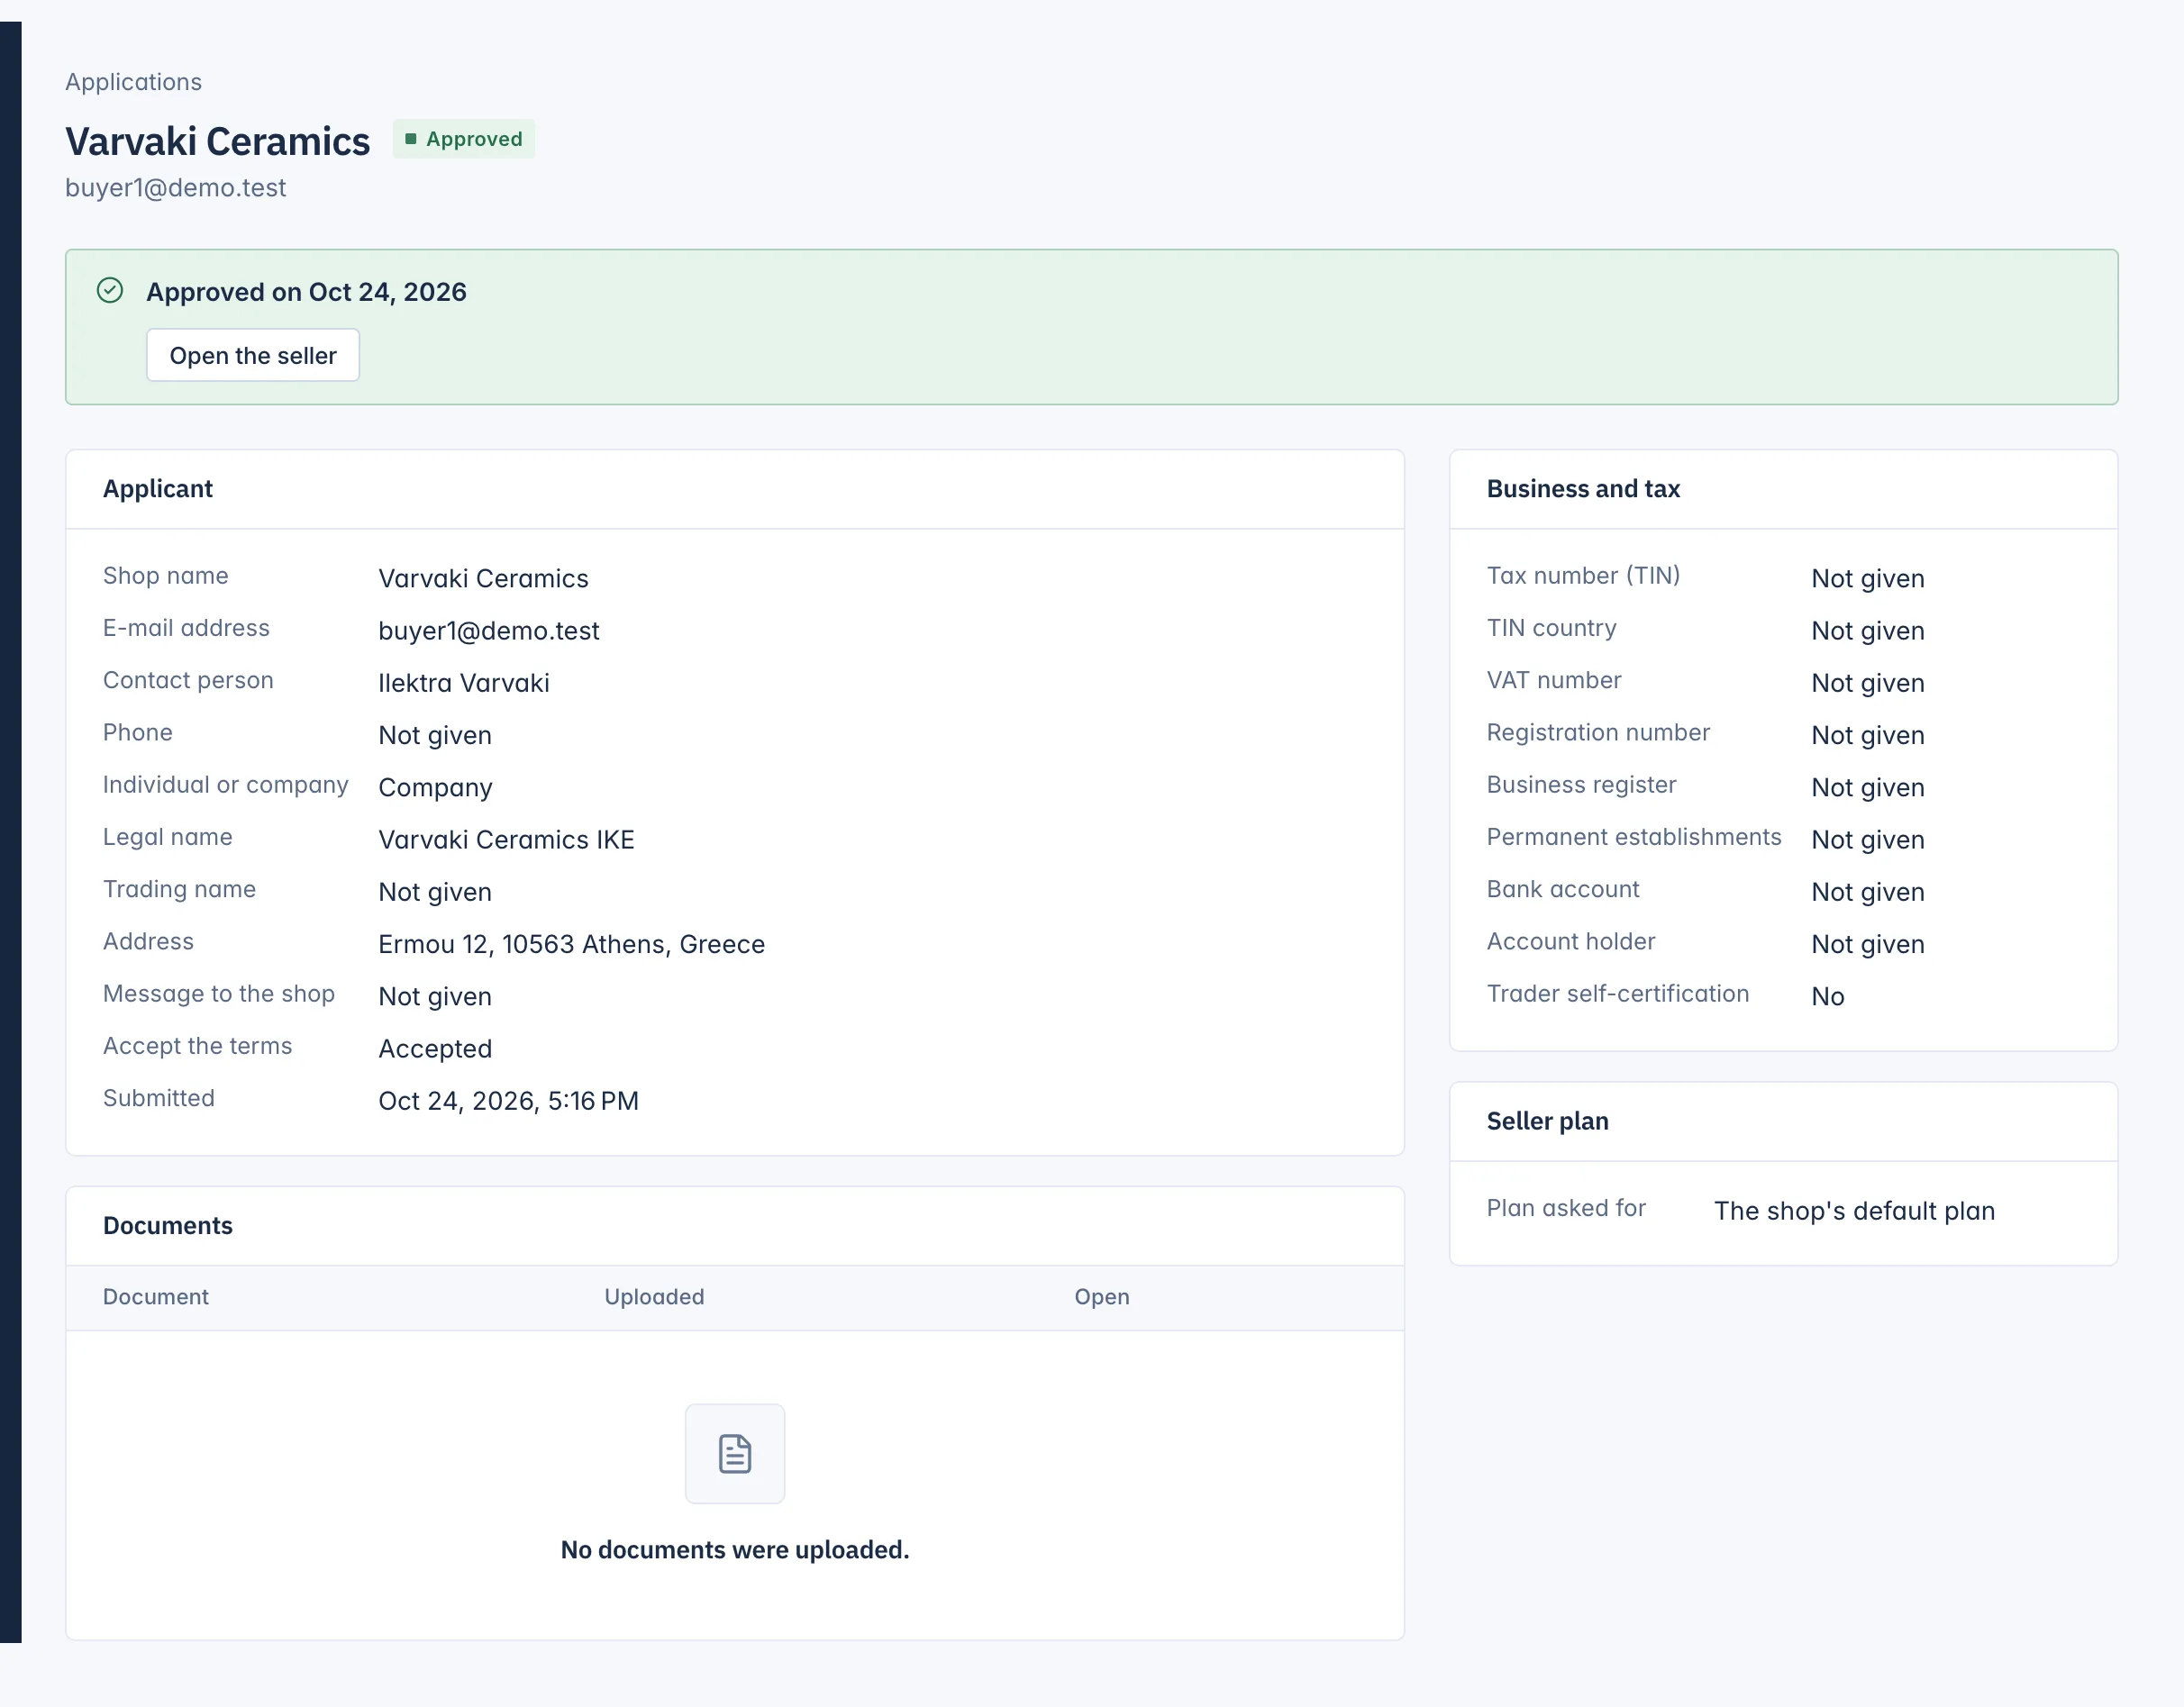
An application page shows:
- Applicant: the shop name, e-mail, contact person, phone, individual or company, legal or personal names, trading name, address, the message to your shop, that the terms were accepted, and when it was submitted.
- Your questions: the answers to the questions you added to the form.
- Documents: the files the applicant uploaded, such as an identity document or business registration. Open gives you a fresh secure link to each file.
- Business and tax: tax number (TIN) and its country, VAT number, registration number and business register, permanent establishments, bank account and holder, and the trader self-certification. Tax numbers and the bank account show only their last four characters.
- Seller plan: the plan the applicant asked for, or The shop's default plan.
Empty answers read "Not given".
Approve an application
- Open the application from the Submitted tab.
- Press Approve, then Approve again to confirm.
The seller becomes active and the applicant gets an e-mail with a link to sign in to the seller panel. If it asked for a seller plan, its plan starts (with the trial, if the plan has one). The page then shows "Approved on" the date, with Open the seller.
An approved seller can sell once it meets your selling mode's needs, for example a connected payment account in Split mode. Check its General tab for anything missing; see Manage a seller.
Decline an application
- Open the application and press Decline.
- Write the Reason. The applicant is told this reason by e-mail, so keep it clear and polite.
- Press Decline application.
The application moves to Declined with the reason you gave. The declined seller's page stays for reference only, and its documents are erased after the keeping period, 90 days by default.
Approving and declining need the right to approve sellers. Others can read applications but not decide them, and cannot open documents.
Invitation only and automatic approval
Two marketplace settings change how applications work:
- Who may apply to sell: anyone (the default), or only people you invite.
- Approval: you approve every seller yourself (the default), or an application is approved on its own once your payment provider has verified the seller. Automatic approval works only for sellers paid through your Stripe Connect platform. Such an application shows "Approved on its own once the payment provider verified the seller."
These two settings have no switch on the admin screens yet. They are changed through the marketplace settings of the REST API; see the Developers section.
Related
Updated 13 November 2026