
Find and add customers
The Customers list: search and filter your customers, read their order totals, and create a customer account by hand.
In the admin: CustomersCustomers
On this page
The Customers list shows everyone who has an account at your shop. Use it to find a customer, see who buys most, or add a customer yourself, for example someone who orders by phone.
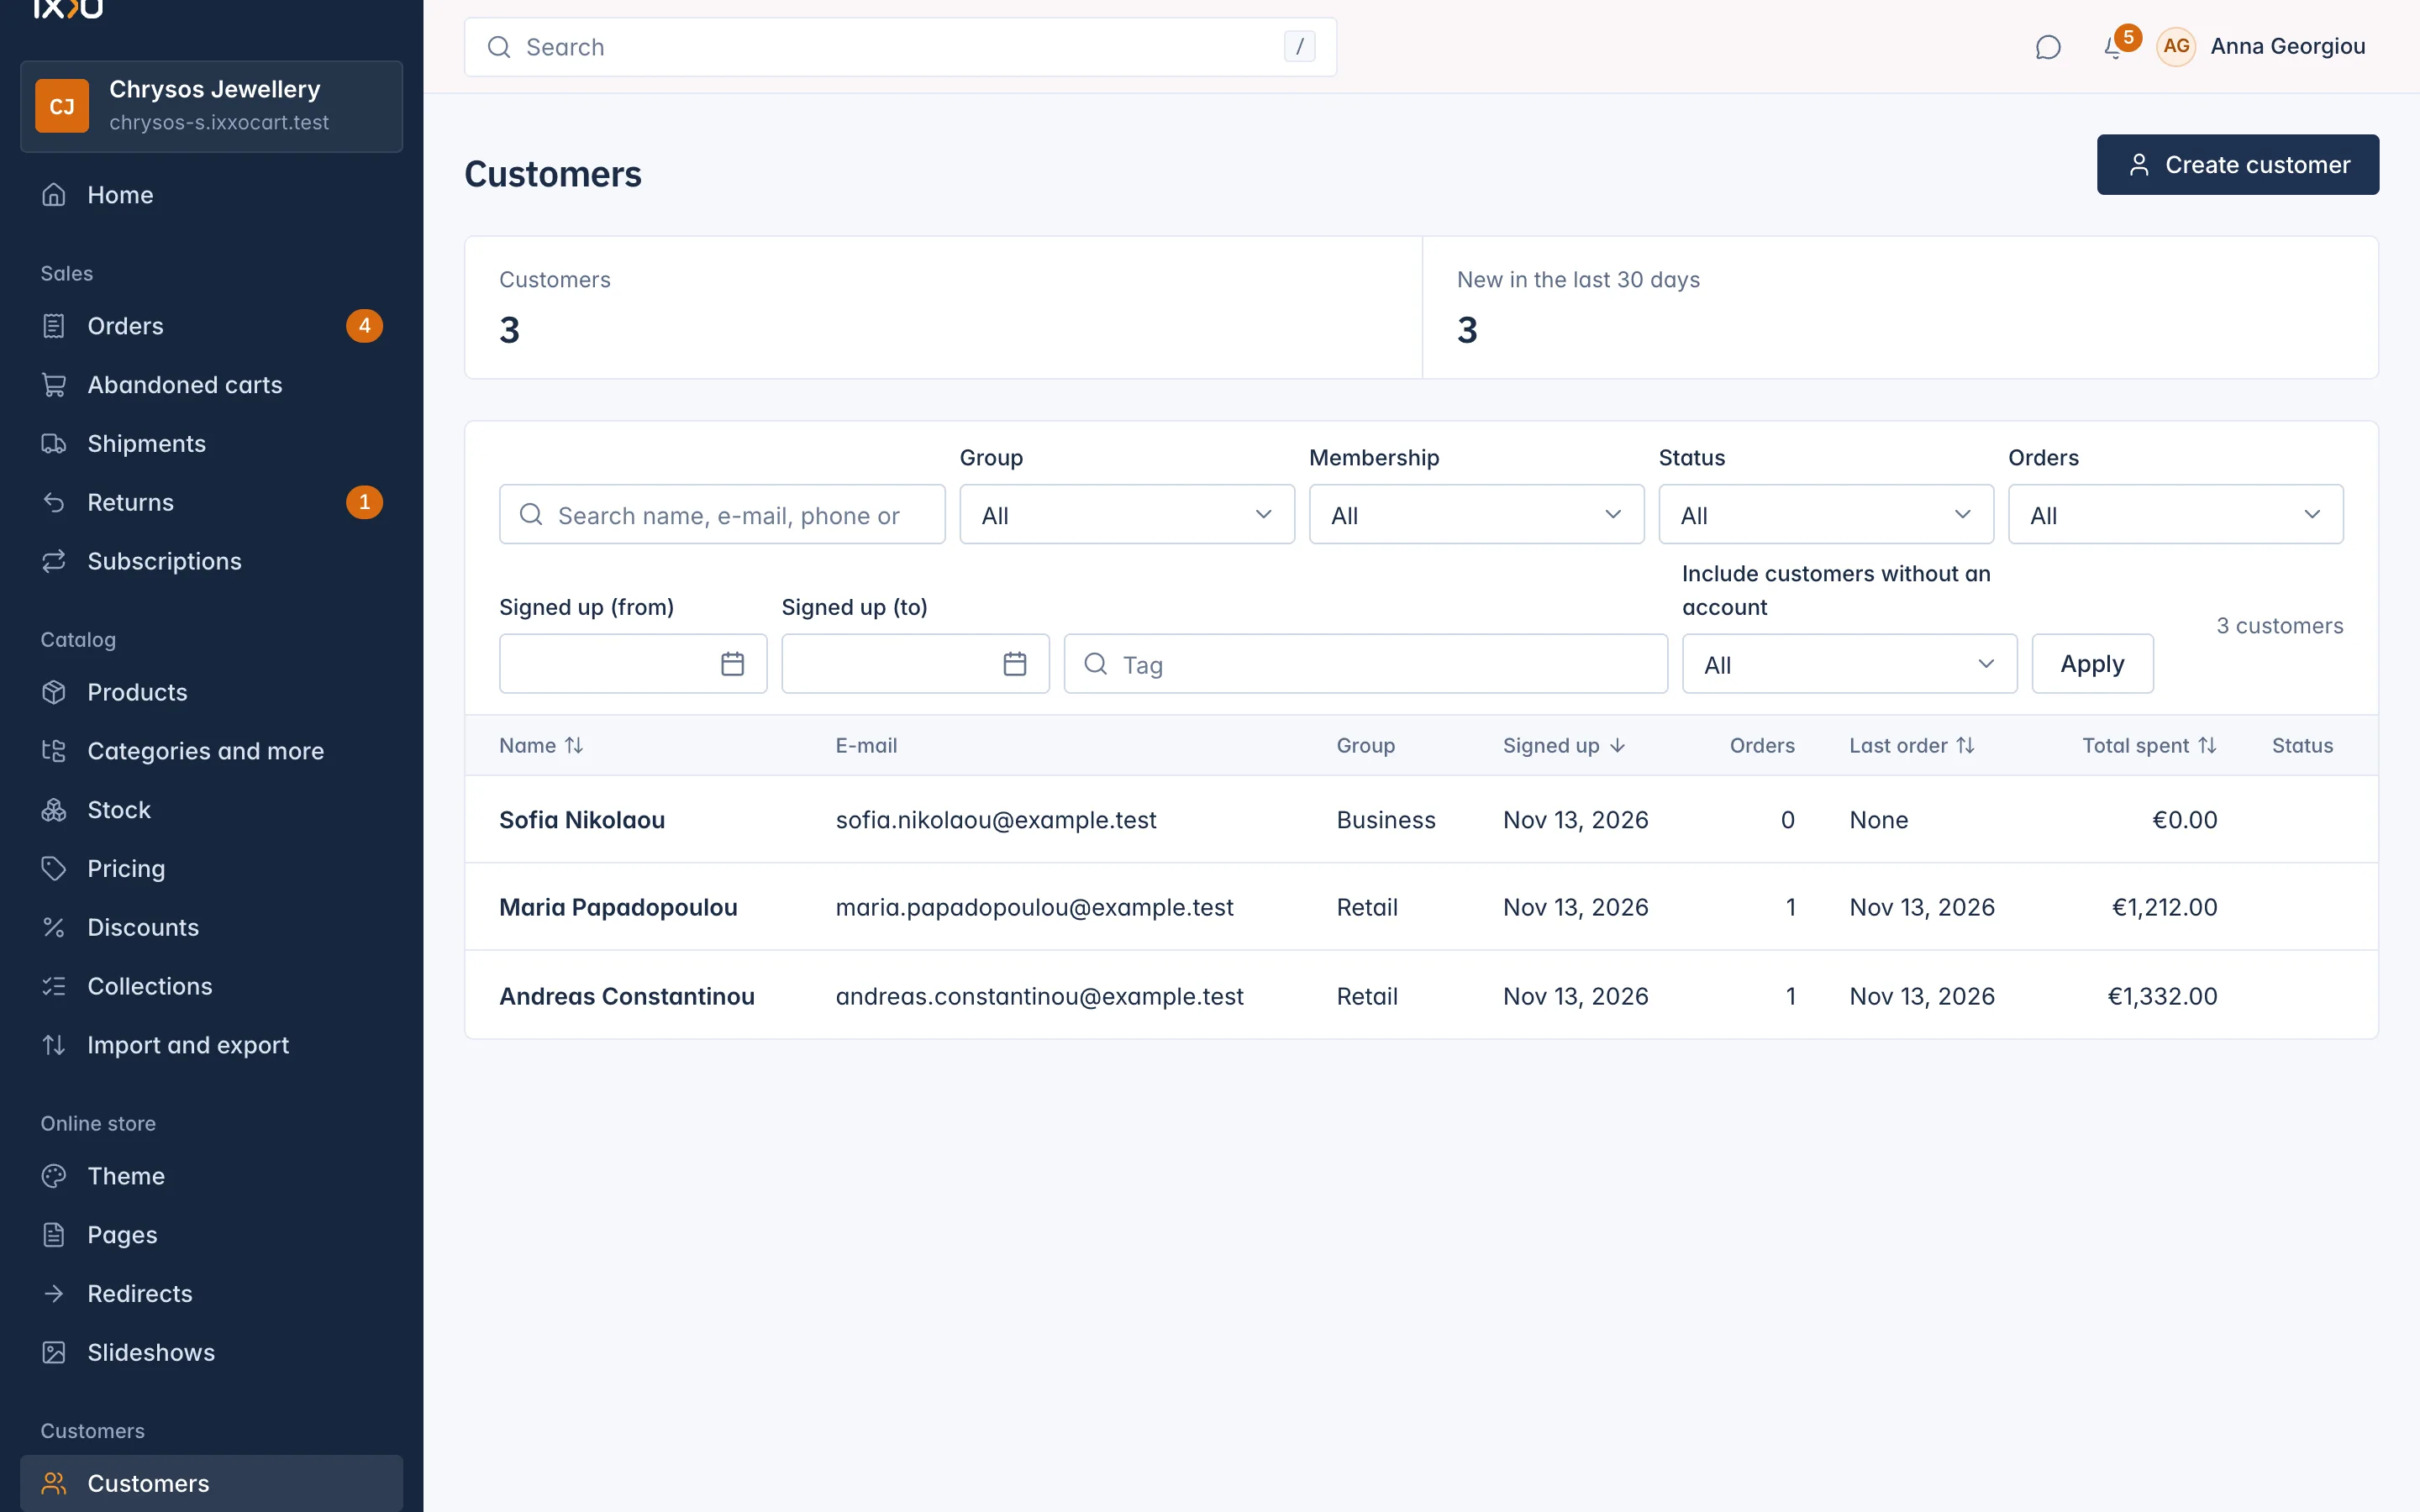
What the list shows
At the top, two figures:
- Customers: how many customers the shop has.
- New in the last 30 days: how many signed up in the last 30 days.
Each row is one customer:
| Column | What it means |
|---|---|
| Name | Opens the customer's page. A customer without a name shows their e-mail. |
| The address of their account. | |
| Group | Their customer group, for example Retail. See Customer groups. |
| Signed up | The day the record was made. |
| Orders | How many orders they placed. |
| Last order | The day of their newest order, or None. |
| Total spent | What they paid, in your main currency. When they also paid in another currency you see + other currencies: amounts in different currencies are never converted or added together. |
| Status | A Blocked badge for a blocked customer, Without an account for a record that has no login. |
You can sort by name, sign-up day, last order and total spent.
Search and filters
The search box finds customers by name, e-mail, phone or company. Type at least 2 letters.
The filters narrow the list:
- Group: one customer group.
- Membership: Any active membership, No membership, or one membership plan.
- Status: Active or Blocked.
- Orders: Has orders or No orders.
- Signed up: a date range.
- Tag: customers with one of your staff tags.
- Include customers without an account: the list leaves out records without a login unless you tick Yes, include them.
Clear filters brings the full list back.
Create a customer by hand
Use this when a customer cannot sign up themselves, or when you take an order over the phone and want them to have an account.
- Select Create customer at the top of the list.
- Fill in First name, Last name and Email. These three are required.
- Optionally add a Phone, an address and a Staff note. To save the address as the customer's default address, fill in at least Address line 1, City and Country.
- Leave Send a set-password email ticked if the customer should choose a password now. Without it, they can use Forgot password on your shop later.
- Select Create customer.
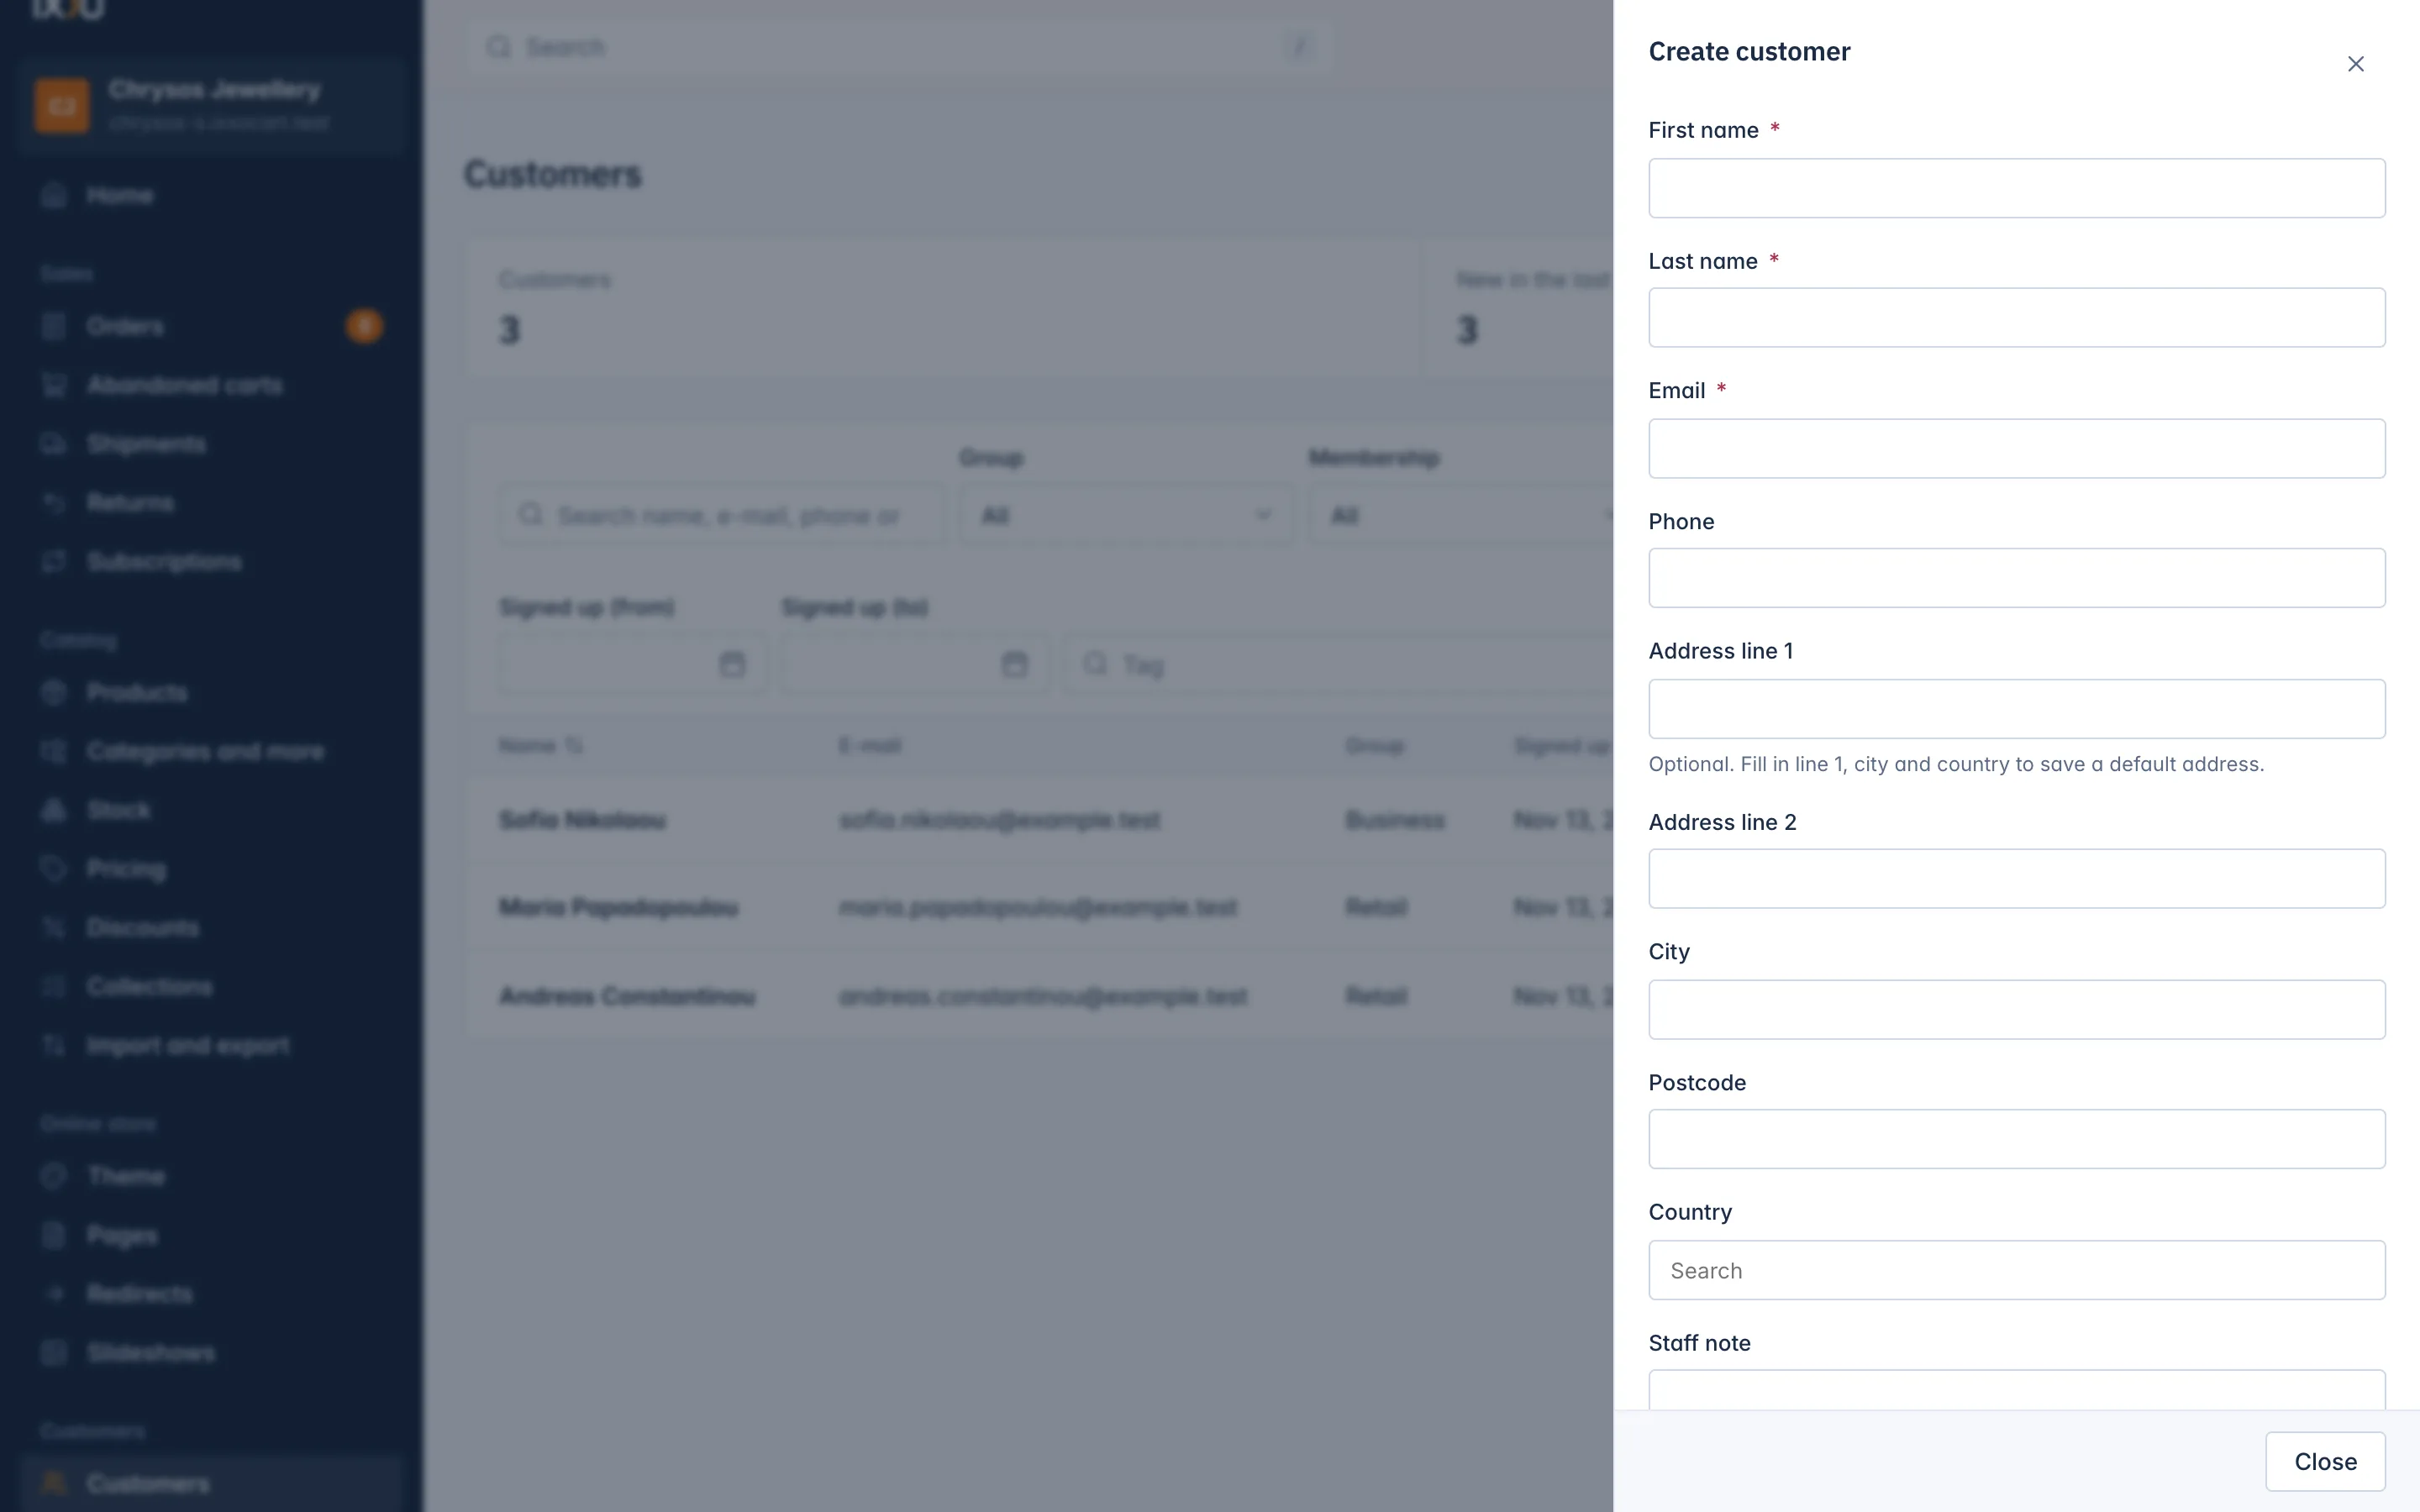
Because you typed the e-mail address yourself, it counts as confirmed: the customer does not get a verification e-mail. Nobody, including you, ever sees or sets the customer's password.
If the e-mail already belongs to a customer of your shop, the drawer says so and offers Open that customer.
Who can see the list
Staff need the See customers permission to open the list and Edit customers to create or change customers. You set permissions in roles, under Settings.
Related
Updated 13 November 2026